DIY Vintage Love Blocks

Valentine’s Day is coming up soon, if you are looking for a cute gift to make someone, or just would like to make something cute for your home- this is the post for you!!

Vintage Love Blocks

I was inspired by this blog, and got to thinking about what I wanted the blocks to have as background text paper- and the bible came to mind. Love, to me isn’t just love between a couple; its about God’s love for us. So I thought it would be SO cool, to use scriptures from the bible that talked about love!! Before anyone hyperventilates, I did NOT use an actual bible. I typed out the verses I liked, and then formatted it to fit my blocks and aged the paper! (no bibles were harmed in the making of these blocks)

You could always use book pages, newspaper etc. if you don’t necessarily care about what is printed on the background of the blocks too.

Here is how you do this & what you will need:

IMG_6011

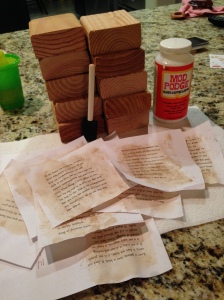
– 4 blocks that have been sanded, and cut to be 4″ squares. I used a 2×4

– paper for your background, you can use my scriptures if you want ->Love Blocks

– mod podge, glossy or matte and foam brush

– tea bag steeped in water (if you want to age printed paper)

– fine tip black sharpie, red and black regular point sharpie

Directions:

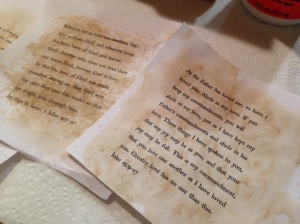
1. If you are printing paper (not using book paper) print that out and age it if you want with tea bags. You steep a tea bag in water for a few minutes for it to get to a darker color, then take the tea bag out of the water and lightly rub it over the pages so the color transfers onto the sheets of paper.

IMG_6012

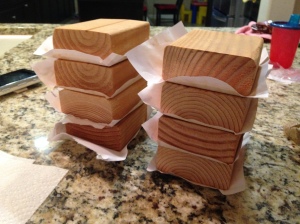
2. You are going to take a thin layer of mod podge and cover the front of your block, and place and smooth out your first sheet of paper. Leave it to dry face down and stack them so they will adhere well.

IMG_6013

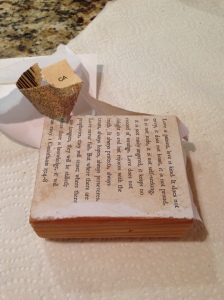
3. Once dry, you can sand the excess edges of the paper off to get a distressed look to the blocks. Its ok for it to have an uneven texture and look messy.

IMG_6015

and after they will look like this

FullSizeRender

4. NOW, you have a choice. You can either trace the letters on if you want with a sharpie (by a stencil, freehand if you’re that gifted, or by printing if off of your computer and using an exacto knife to cut out the letters and be left with a stencil letter to use on the blocks) or you can use a cricut, silhouette or any other kind of crazy vinyl device I may not know about to adhere your letters onto the blocks.

I chose to trace my letters on, so I took the fine tipped sharpie and outlined the letters, and then filled them in with the thicker (regular point) sharpie.

[/caption]

5. If you want to leave them natural, go right ahead and your done! If you want to seal the blocks go ahead and put another layer of mod podge over all of the sides of the blocks. I did this in a gloss finish and it didnt distract or take away from the distressed look of the blocks, and I know they are all sealed and will last a long time.

IMG_6071
press.com/2015/01/img_6071.jpg”> I love that the words show through the red heart.

I loved the result- and the

[/caption]

I loved the result- and the possibilities of how you can make these your own! Stack them to have a cute effect as well.

IMG_6070

2015/01/img_6076.jpg”> far away shot, on my mantle.

Now, every time I look at these I am

[/caption]

Now, every time I look at these I am reminded of His love. Its perfect!

Table & Chairs Makeover

fresh & organic.jpg

One of my favorite things to do is refinish furniture.

Its oddly therapeutic, and at the end of my projects I step back and just smile when I see a piece transform.

I’m 1000% an Annie Sloan Chalk Paint enthusiast, its the easiest way to refinish anything, but there are times when its not ideal to use it. This project was one of those cases.

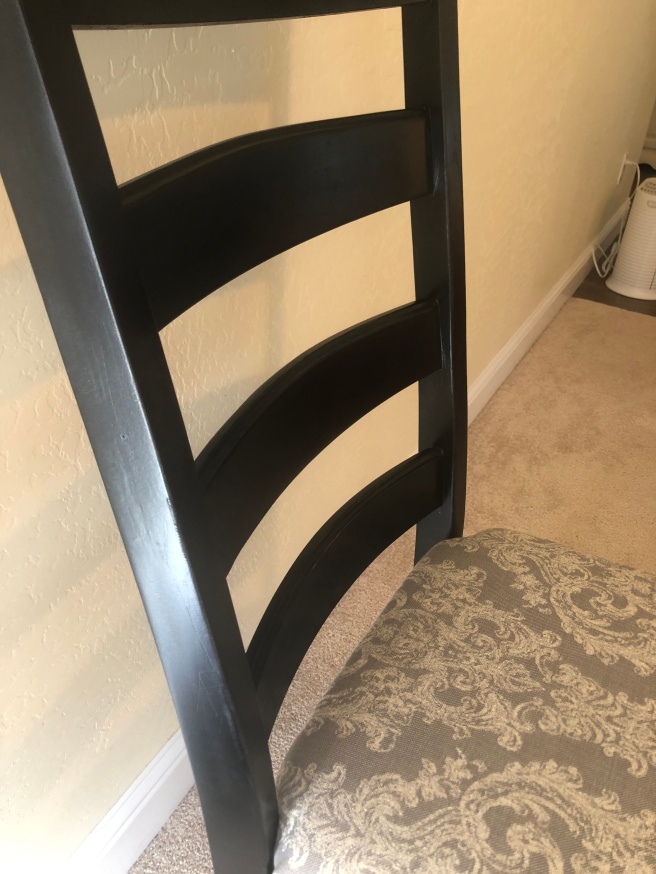
IMG_3389.jpg

IMG_3397.jpg

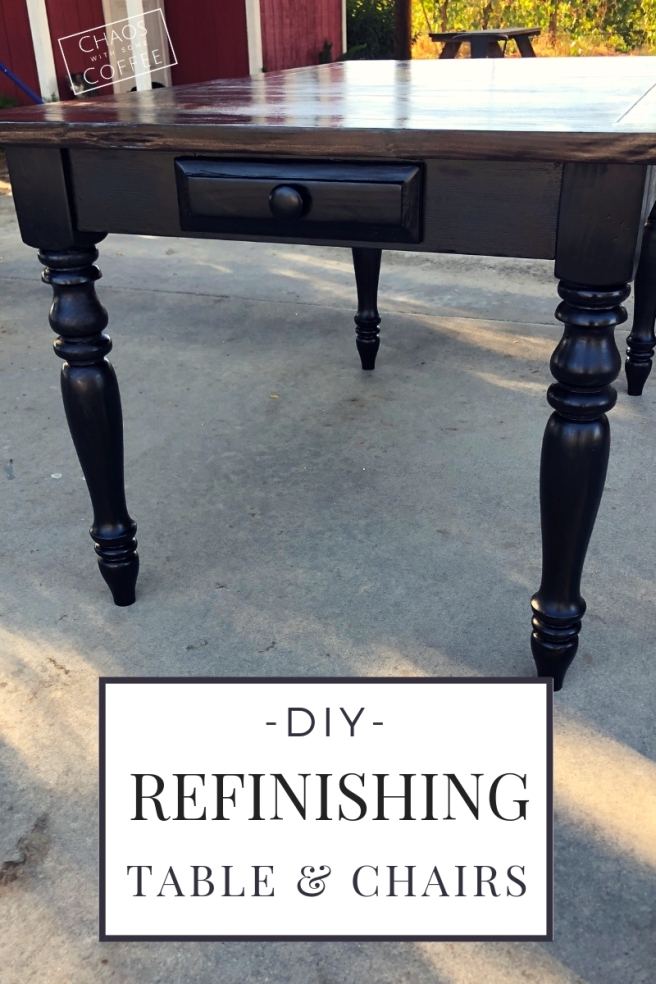
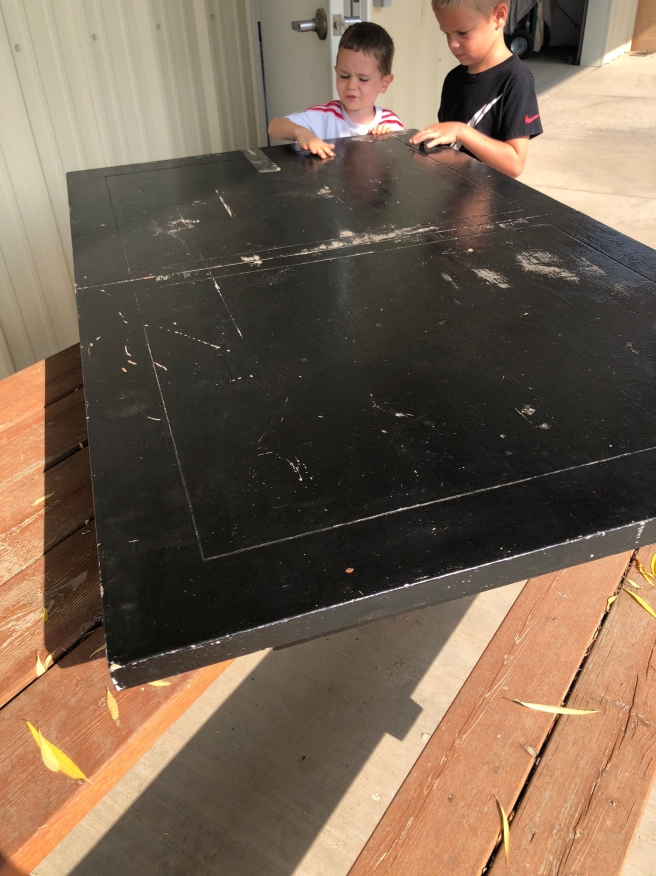
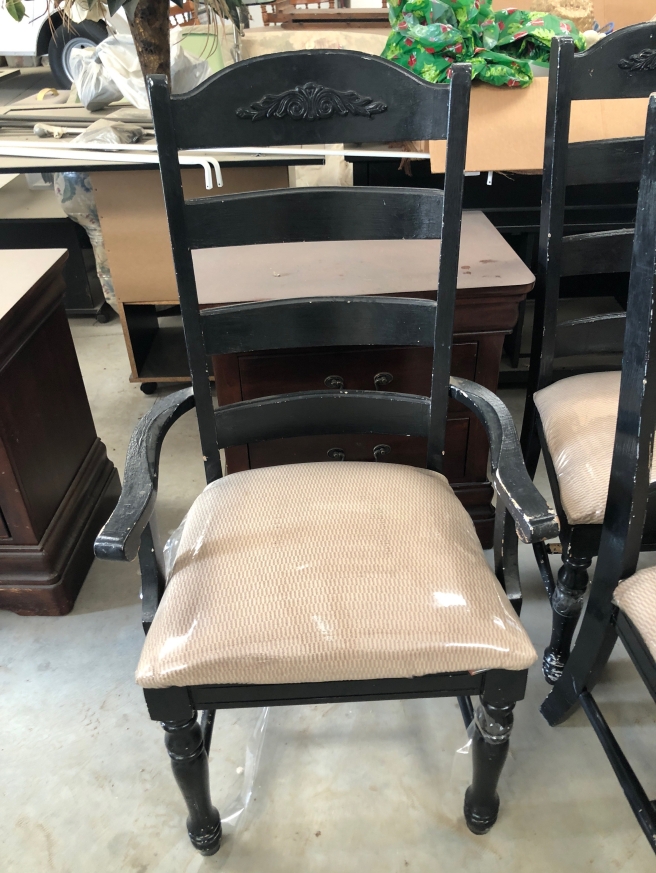
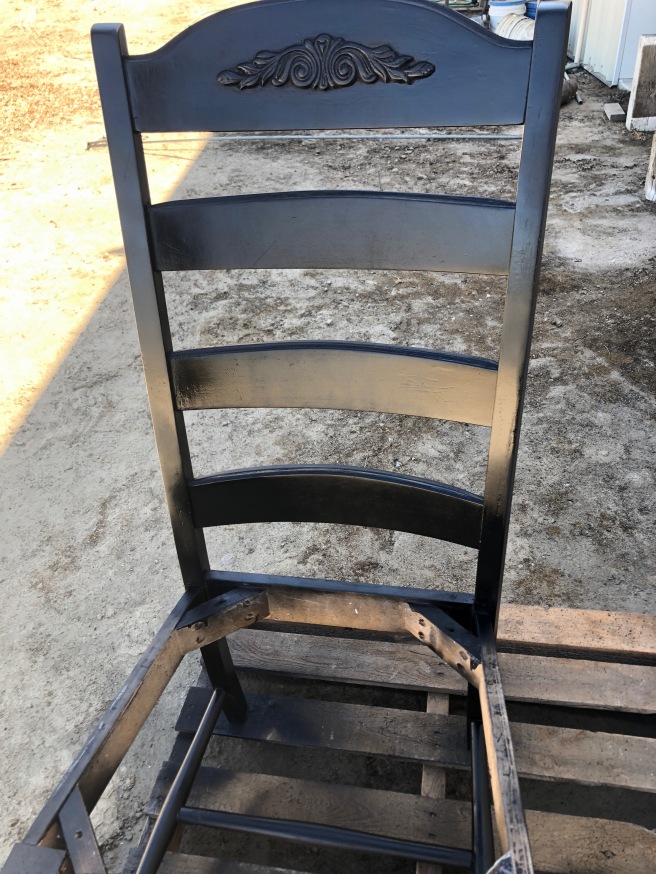
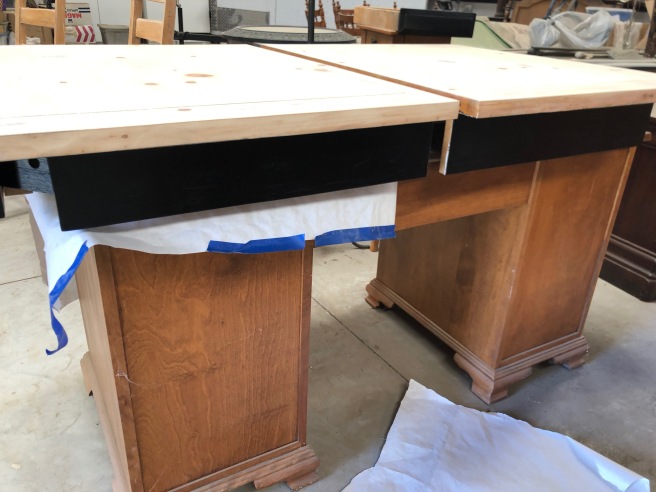
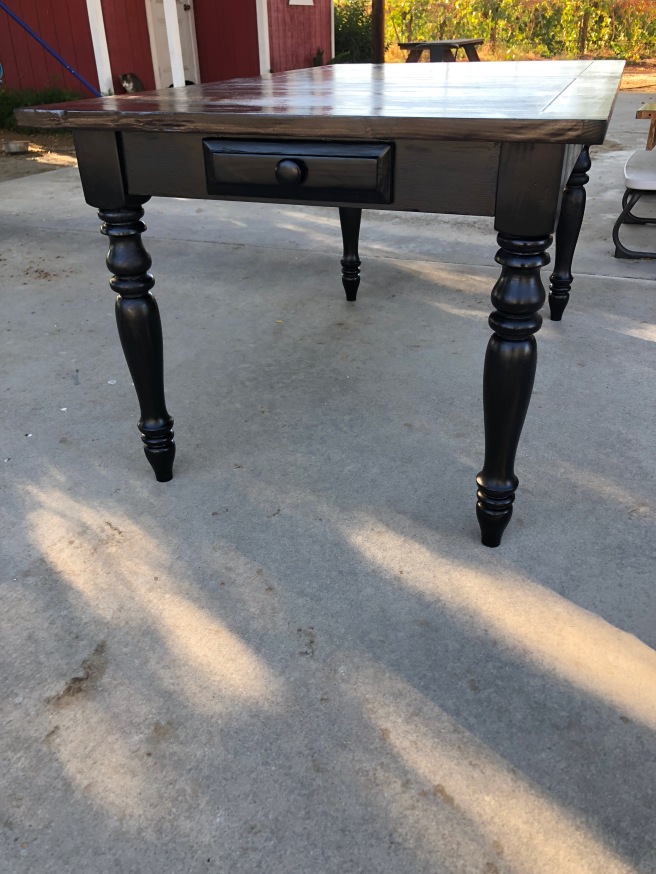
I took the job of refinishing this table and chair set, her request was to have the base and chairs repainted black. It started out originally as an oak table and chair set, it had such good bones, it was an old Thomasville set and really would look nice. Annie Sloan does make a graphite color similar to black, but if you are going for true deep dark black, its not really right (even with using their black wax). That was reason 1 that I couldn’t use Annie Sloan, reason 2 was the condition it was in. The best part about Annie Sloan is that there is no prep involved. You can literally paint over finishes without having to sand or strip. This table though, it had been repainted years before. with good ol’ primer and latex paint. It was peeling, chipping, uneven in its application and was just not something you could paint over.

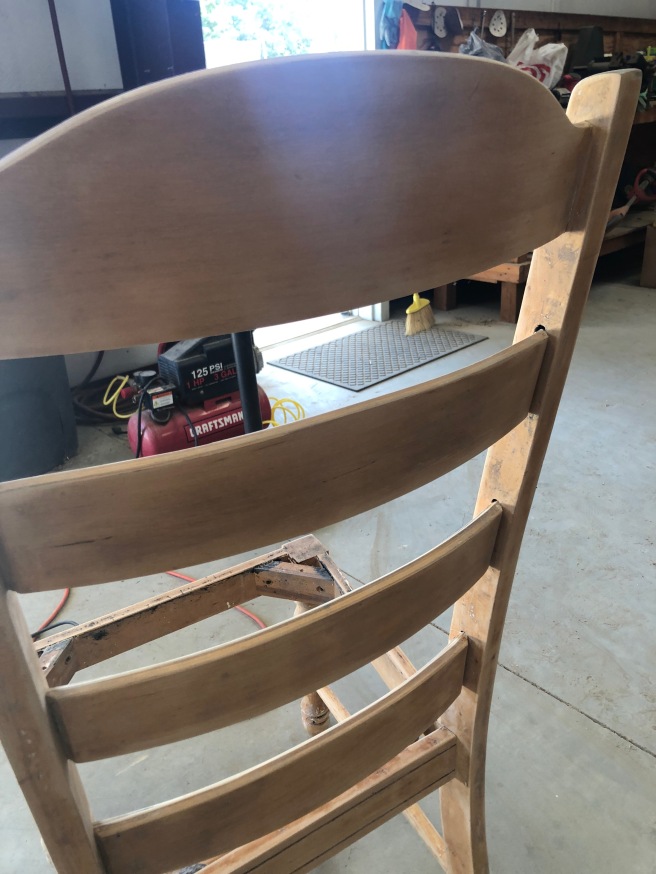
With that being said, I had to strip all 8 chairs, two leaves, 4 legs, base and top of this table set. It was NOT ideal. Stripping furniture is a real pain, and that’s putting it lightly. So, if you find yourself in. The same situation, with an old piece with uneven latex paint that you want to refinish, here is what you do.

Step 1: STRIP IT.

At first, I tried to just sand this without having to strip it. This did not go quickly, and I knew that I would have to remove the paint, just sanding would not be an option.

IMG_3391

Use  the strongest one you can find. I wasted SO much time trying to use a greener stripping product, called Citristrip. I then tried KLEANSTRIP and it was SO much better. Still lots of work, but much better.

IMG_3557.JPGBe sure to do this outside, theres no way you’d do this messy of a project inside, but I need to say in case, DO THIS OUTSIDE. Wear Chemical Resistant gloves! 

Follow the directions on the product, and chip away it it. You will alternate between applying the stripper, and scraping it off with a putty knife. This takes forever, no joke. On flat surfaces like the table top, its quick, but on chair legs with nooks and crannies, its a nightmare. Just keep chipping away at it and eventually you will get it all off and you can move on to Step 2, Sanding.

Step 2: SAND.

Once you have all the paint off, you will no doubt have an uneven finish, its inevitable. Take your palm sander, or if you’re a superhero, regular sandpaper and use elbow grease and sand your whole piece until you get a smooth even finish.

Step 3: PAINT. 

Depending on what you choose to paint with, paint your piece. In my case, I wanted an even application, and at this point, I had spent well over 60 hours stripping and sanding this project. I didn’t have it in me to hand paint anything!

If you wanted to use Annie Sloan, this would be the point you could. Like I said, graphite wasn’t dark enough, so I wasn’t able to use chalk paint. I don’t think I could have hand painted it though, I was so sore, tired, and just irritated. I estimated this taking 12 hours (I hadn’t seen the table) and was way past that.

What I ended up doing, and I had done this on a previous table and chair set, was to use a Rusteoleum Paint and Primer Spray Paint- in Satin Black. 

IMG_3952IMG_4738IMG_4740

So, I applied two coats on all pieces.

Stain- If Applicable

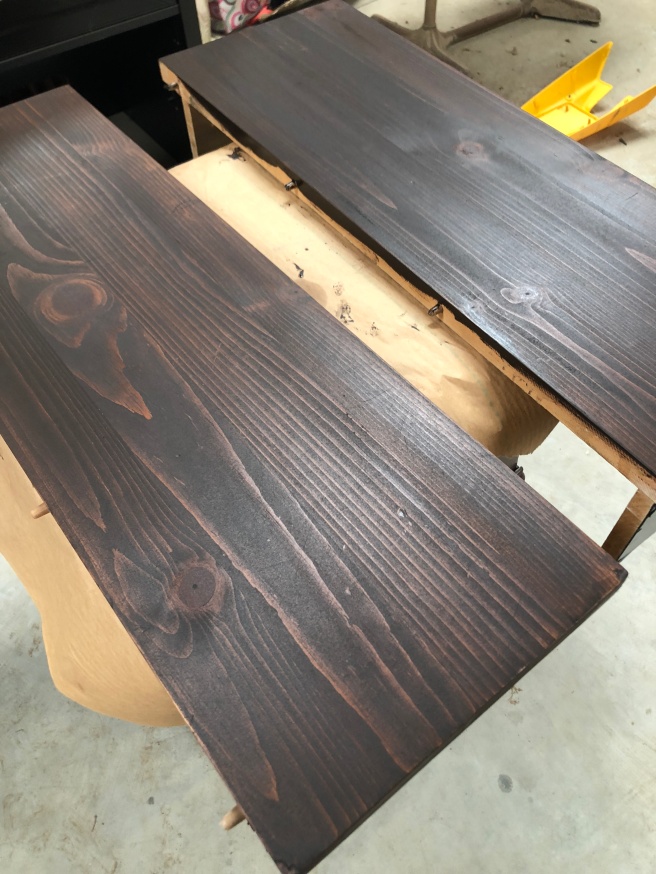
** This is sort of a step in itself, but its not totally necessary, you could paint your whole piece one color. It was requested that the top of the table be stained a dark color. So I took my General Finishes gel stain (my fave) in Java and wiped two coats on, letting it dry each time between  coats. I used a glossy finish poly on top.

Step 4: SEAL.

I wanted to be totally sure this finish would be protected, so I took my wipe on poly in satin finish, and wiped all of the chair legs, table top, and sides down and it was finally done!!

After I was done, my faith in chalk paint was renewed. This was SOOOO much more work than (ideally being able to) just painting over a finish, and waxing it to seal.  If I had to choose, I’d choose chalk paint any day. Like I said though, this wasn’t an option for this project.

If you find yourself in a similar situation, I hope this gives you insight HOW TO PROCEED with it.

Happy Painting!

Thanksgiving Tradition

Over the years, we have had some pretty cute traditions with the boys around Thanksgiving.

While you have small kiddos there is only so much you can do to capture their attention or even help them comprehend the certain holiday or its meaning.

Nevertheless, I still try to do fun things that they will hopefully look back on and remember and look forward to each year.

10610805_10100469682130351_3283046567636403453_n (1)

In years past we have done thankful leaves, where I ask the boys what they are thankful for, I write it down (and now they can write themselves) on a leaf cut out on construction paper and I display it. When we are all done, you step back and see how many things you are thankful for and its so cool. You can add to it and add new things daily, or when you are reminded just keep adding to your leaves. Display them in fun ways, in a big mason jar attached to twigs and hole punched and either tied with twine or slipped onto the branches. Tape them to the wall, make garland out of all of the leaves, there are endless possibilities.

10356763_10100469682060491_3795600689572905307_n

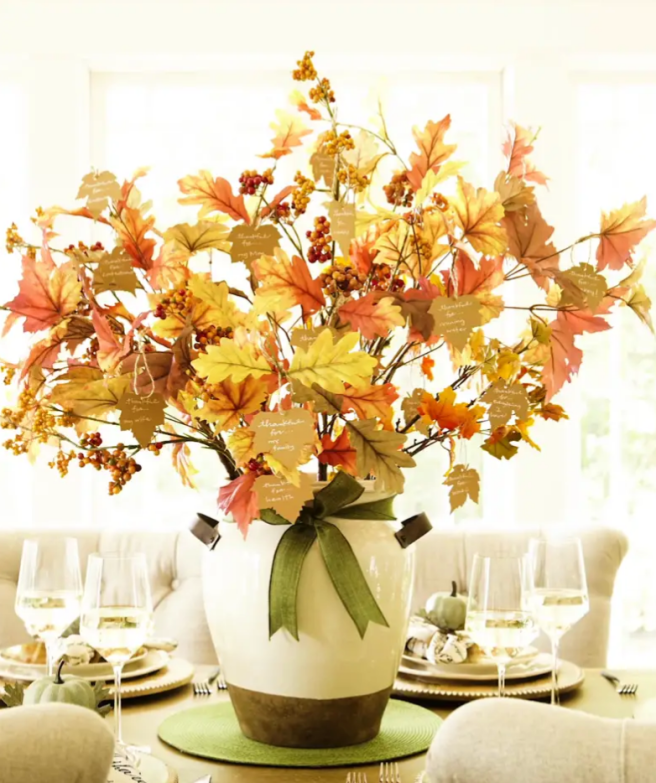
I wanted to reinvent this tradition this year, and I came across EXACTLY what I was envisioning in my head from a Pier1 post on Pinterest- totally meant to be.  I have a vase that is basically EXACTLY like their picture too- winning!!

Screen Shot 2018-11-19 at 9.27.40 AM.png

I want to SAVE the leaves, and use the centerpiece year after year, and then look at the leaves from years past. Seeing what we all said we were thankful for that year, recognizing the kiddos handwriting as it improves and it will totally warm my heart. So I’m going to cut out this printable and I will bring back the leaf tradition in a more design friendly way each year. So fun!

The other fun thing we did was cut out these cute turkeys from pinterest.

1932473_10100461408760251_867353697102675053_n

1510837_10100461408685401_7958071153430958771_n
Look how tiny they were!

I let the boys cut the printable out and use glue sticks and attach all the pieces. I saved these for years (and still have them) and put them on their doors as thanksgiving approached.

We have made Turkey hats out of construction paper.

I have used from of course, Target, a coloring table cloth for them to draw on.

Its really all about getting them excited for the holiday and lets face it, OCCUPYING them while you are in the kitchen. Don’t make it complicated, seriously just go through the Dollar Spot at Target and grab something fun, these little simple moments are what make it fun. You will look back and laugh at the fun things you did in the midst of basting your turkey and throwing dishes in the oven.

12308187_10100712858742471_2172370254660018220_o.jpg

Hopefully this gives you some ideas for Thanksgiving this week and you make some special memories together. If you missed the Thanksgiving recipes post, and need some ideas you can see that here.

Happy Thanksgiving!

Thanksgiving Favorites

Thanksgiving is less than one week away! I can hardly believe it!

Its one of my favorite holidays, because I look forward to preparing family favorites each year. The thanksgiving meal is seriously such a special thing for me.
With that being said, I wanted to share the tried and true recipes we have used and have grown to love and look forward to!

I’ll be sharing our Herb Roasted Turkey, Fresh Green Beans, Loaded Mashed Potatoes, Rosemary Rolls, and Pumpkin Pie recipes with you!

ALL of these are delicious! 

Herb Roasted Turkey Recipe By Sandra Lee

  • Servings: 8
  • Difficulty: easy
  • Print

Ingredients

  • 1 (13 pound) frozen Turkey breast, thawed
  • 1/4 cup canola oil
  • 2tsp chopped fresh rosemary
  • 1T chopped fresh thyme
  • 1T chopped fresh sage
  • 1/2tsp chile powder
  • 2tsp garlic powder
  • 1/2tsp crushed red pepper flakes
  • kosher salt and freshly ground pepper
  • 1C chicken broth

Directions

  • Preheat the oven to 350 degrees F.
  • Remove the legs, thighs, and wings from the turkey, or cook with them- and just adjust your cooking time for a standard turkey with all parts.
  • In a bowl, stir together the oil, rosemary, sage, thyme, garlic powder, chile powder, red pepper flakes, salt & pepper.
  • Insert your hard under the skin of the breast and gently separate the skin from the muscle, and then put a spoonful of the herb oil inside and rub it around. This really makes the flavor of the turkey amazing!
  • Spoon the remaining oil on the outside of the turkey.
  • Pour the broth into the bottom of your roasting pan (and set the turkey on a wire rack).
  • Roast the turkey for 55-60 minutes.
  • INCREASE the temperature to 450 degrees F and cook until the skin of the turkey is browned and your inserted thermometer reads at least 165 degrees F when inserted in the thickest part of the turkey, about 15-20 minutes.
  • Let the turkety rest for 15 minutes before carving so the temperature of the turkey rises to 180 degrees F.

** Adjust the cooking time if you decided to opt out of using just the breast and you cook the whole turkey. I’ve done this recipe both ways. Its delicious every time!

Fresh Green Beans by Pioneer Woman

  • Servings: 6
  • Difficulty: easy
  • Print

I always double this recipe- its delicious and goes fast!

Ingredients

  • 1lb fresh green beans
  • 2T bacon grease (or 1T bacon grease and 1T olive oil)
  • 2 clovies garlic
  • 1C chopped onion
  • 1C chicken broth
  • 1/2C chopped red bell pepper
  • 1/2tsp salt
  • ground black pepper to taste

Directions

  • Snap the ends off of the green beans or cut them off in a bunch
  • Melt the bacon grease in a skillet over medium heat. Add garlic and onions and cook for a minute. Then add the green beans and cook for a minute until they turn bright green.
  • Add chicken broth, chopped bell pepper, salt & pepper. Turn heat to low and cover. Leave the lid cracked, and cook for 20-30 minutes or until liquid evaporates and beans are fairly soft, yet still a bit crisp.
  • You can add more chicken broth during the cooking process, let it cook all the way and let the onions caramelize.

Loaded Mashed Potatoes by Swanson

  • Servings: 6
  • Difficulty: easy
  • Print

We usually double this recipe as well. I’ve used russet and yukon gold potatoes, both turn out well.

Ingredients

  • 2 cups Swanson® Chicken Broth or Swanson® Organic Chicken Broth or Swanson® Natural Goodness® Chicken Broth
  • 2 1/2 pounds potato, peeled and cut into 1-inch pieces (about 6 cups)
  • 1/2 cup light cream
  • 1/2 cup sour cream
  • 1/4 cup chopped fresh chives
  • 2 tablespoons butter
  • 3 slices bacon, cooked and crumbled (about 3 tablespoons)

Directions

  • Heat the broth and potatoes in a 3-quart saucepan over medium-high heat to a boil.
  • Reduce the heat to medium. Cover and cook for 10 minutes or until the potatoes are tender. Do not drain.
  • Mash the potato mixture with the light cream, sour cream, chives, butter and 2 tablespoons bacon. Season to taste. Sprinkle with the remaining bacon.

Ever watch the FRIENDS episode about the cookies? Turns out Pheobe’s grandma’s cookie recipe was off of the back of the nestle tollhouse package— well this is the same. This is straight off of the can of Libby’s and my mom has made it for as long as I can remember. Its delicious! If it ain’t broke, don’t fix it.

Our Favorite Pumpkin Pie Recipe by Libby's

  • Servings: 8
  • Difficulty: easy
  • Print

Ingredients

Directions

  • Preheat oven to 425 degrees F.
  • Combine sugar, salt, cinnamon, ginger and cloves in small bowl. Beat eggs lightly in large bowl. Stir in pumpkin and sugar-spice mixture. Gradually stir in evaporated milk. Pour into pie shell
  • Bake for 15 minutes. Reduce temperature to 350 degrees F.; bake for 40 to 50 minutes or until knife inserted near center comes out clean. Cool on wire rack for 2 hours. Serve immediately or refrigerate. (Do not freeze as this will cause the crust to separate from the filling.)

Rosemary Rolls-

There is no recipe needed for this, just a really cool Thanksgiving hack for you!

Use whatever rolls you have, whether its frozen or fresh, and put some melted butter on top of each roll and sprinkle some chopped fresh rosemary over them (you should have left over if you used the herb turkey recipe) and put them in the oven to warm!  If you are using frozen rolls, cook them according to the package instructions and then when they are done, or almost done remove them add butter and rosemary and pop them back in to warm and you will have amazing artisan tasting bread. We all loved it when I did this last year! It made the rolls taste SOO fancy!


I hope you try some of these recipes and that you have a Happy Thanksgiving!

WHOLE NEW NAME!!!

Huge update!
When I made Doing It Like Martha in 2013, times were totally different.
Now with the evolution of farm house style, moving out to the country, becoming a huge chalk paint and coffee enthusiast, I knew I needed a name change!

Here it is, and I feel it accurately defines my life. Full of chaos and coffee 🤣 ☕️

Momlife at its fullest!
The blog got a little facelife! A new fancy name and website, and beautiful color!

I’ll be bringing you all the same content with a fun new catchy (and applicable) name!
What are your thoughts?!

White Washing Brick With Chalk Paint

I love using chalk paint, it is no secret. Its really versatile, easy to use, and one can will last for so many projects!

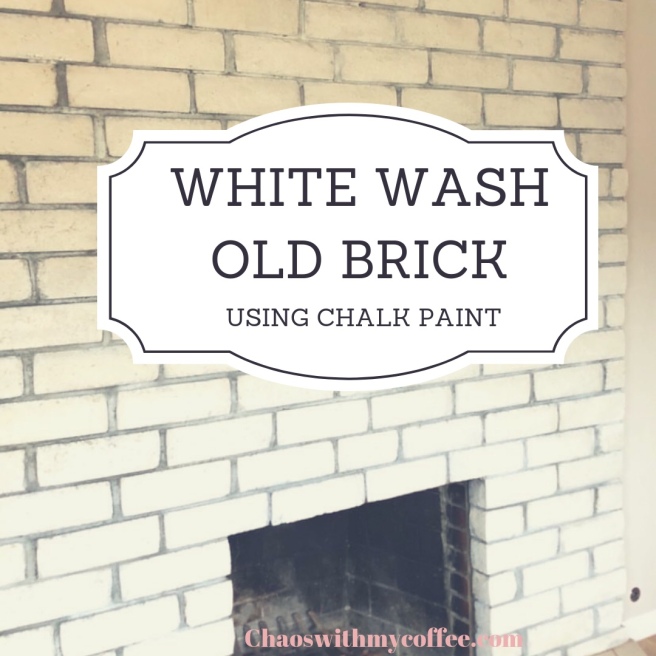
Did you know that you can use chalk paint to WHITE WASH brick? Yep! Regular chalk paint you already use can be watered down and applied to brick to create a modern farmhouse look!

Here is what you do:

Clean your brick, and take off any existing soot, dirt, or dust. Just use a damp rag and wipe it down.

Grab your chalk paint, paint brush, and bowl to dilute it.

IMG_7547

Water it down in a 3:1 ratio. 3 parts chalk paint, 1 part water.  Stir that all together.

When its all mixed, take your brush and dip it into the mixture just like you would regular paint. Just be prepared for it to be more drippy (thats totally a word, right?) so have a drop cloth or some sheets spread out to catch the drips.

IMG_7548

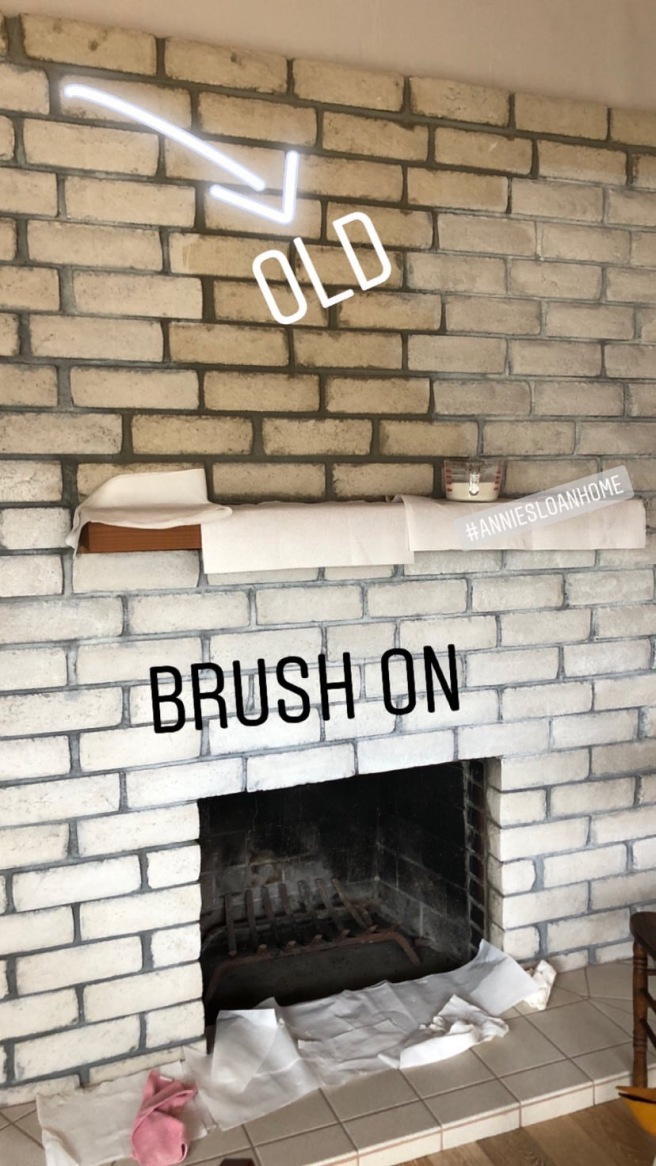
Apply it and brush it on like you would any regular paint. This will be more opaque than paint obviously because it is watered down.

This is where it gets fun, depending on the look you are going for, you can apply it more lightly all over, or in some of the areas for a varied look. You can apply it and wipe it off on some of the bricks for variation, or you could totally keep it a consistent level of coverage and not wipe it down at all.

It all depends on what you’re looking for. For my scenario, the brick started as an ugly brown grey brick and I didn’t really want to see any of it. So I did NOT wipe any parts of the brick to reveal any exposed color.

I applied two coats of chalk paint white wash, and the beauty of using the Annie Sloan brush because of its design, it really got into the grooves of the grout and covered the area of brick nicely.

IMG_7550

I didn’t want it to appear to be PAINTED brick, I wanted it to look vintage or shabby chic, and to brighten up. By doing two coats of pure white it was just a subtle enough change to be noticeable and really clean up the old dingy brick.

IMG_7551

You can really achieve all kinds of different looks and finishes depending on what brick you are starting with, and how you apply it. This is my favorite part of doing projects like this, you totally see an area take new life and its not complicated to do!

IMG_7552

Hopefully this gives you some inspiration for projects in your home!

IMG_7549

Boys Bathroom Mini Makeover

The Cupcake Chronicles

I’m all about farmhouse, industrial, rustic style. After-all, we do live out in the country on a ranch.

Naturally, I was getting an itch that just couldn’t be scratched without some DIY.

I wanted to make the boy’s bathroom a little more masculine looking.

With a few minor changes, and of course some chalk paint, we had a whole new look for their bathroom.  By swapping existing light fixtures, getting new mirrors that I chalk painted, we were able to achieve a totally different feel!

DoingItLikeMartha.wordpress.com-2

The new mirrors were a chunky wood framed mirror from Lowes that I was able to chalk paint using Graphite from Annie Sloan Chalk paint. (read more about chalk paint here) 


Link to Mirrors We Used

Screen Shot 2018-10-29 at 11.53.36 AM.png

The new light fixtures also came from Lowes, click to view them

Screen Shot 2018-10-29 at 11.50.05 AM

Here is how it looked with the light fixtures changed and the new mirrors as they came, not chalkpainted.

The Cupcake Chronicles-2.jpg

I really wanted a dark framed mirror but couldn’t find one that I liked. So out came the good ol’ chalk paint to achieve the look I wanted. The graphite really pulled in the grey tones in the granite and hardware finish color.. AS WELL AS take care of me not obsessing about clashing wood colors between our cabinets and the wood tile floor.

The Cupcake Chronicles-4

After Chalk painting with Graphite

The Cupcake Chronicles-5

All done!

Untitled design

Teacher Mason Jar Craft

FullSizeRender

FullSizeRenderI love making handmade gifts. If there is a holiday, you can pretty much guarantee I will want to make something to give someone. Call me crazy, or just resourceful because the nearest store with craft supplies (besides a dollar general) is more than 30 miles away; its just easier to make something sometimes!


Having some basic craft supplies that you buy for a project once will last for multiple projects. With that being said, I had all of the materials on hand to make these cute little mason jars for the kiddo’s teachers as a beginning of the year gift. This would be perfect to give a teacher anytime! Christmas, Teacher appreciation day, you name it!


Materials You Will Need:

  • Acrylic paint in red, pink, yellow, brown, grey, black and green.  Feel free to mix red and white for pink and black and white for grey, if you don’t want to buy all of them. I didn’t have black so I mixed blue red and brown til I got a deep enough color to pass for black
  • Paint brushes, foam brushes are my fave. They always come in a pack and you can just toss them when you are done since they are so cheap.
  • Paint pens if you want to trace the zig zag pattern on the pencil or write No. 2 on it in black or the teachers name
  • Painters tape if you want to have super clean lines by the rim or any areas on the pencil you want to be crisp.
  • Mason jars, I used 16oz
  • Twine
  • Pencils or candy to fill up the cups

I used this image (that had no instructions) from Pinterest, it was a craft I think they did at Michael’s. (its not the best quality, but you get the idea)

FullSizeRender

Directions:

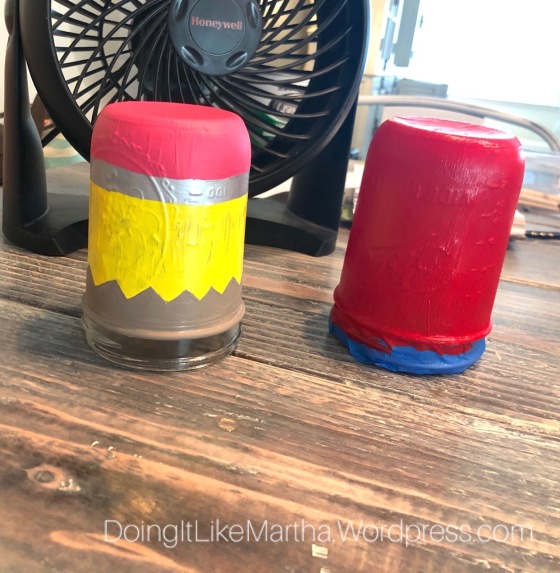
For the pencil I used, black, pink, grey, yellow acrylic paint. I actually didn’t have some of the colors, so I mixed red and white to make pink. I didnt have the black either and mixed some blue red and brown to make a deep enough color to pass for black since it was just a small spot on the pencil. You have to be resourceful sometimes

FullSizeRender-4FullSizeRender-4

It took my mason jar and and used some paint pens I already had.

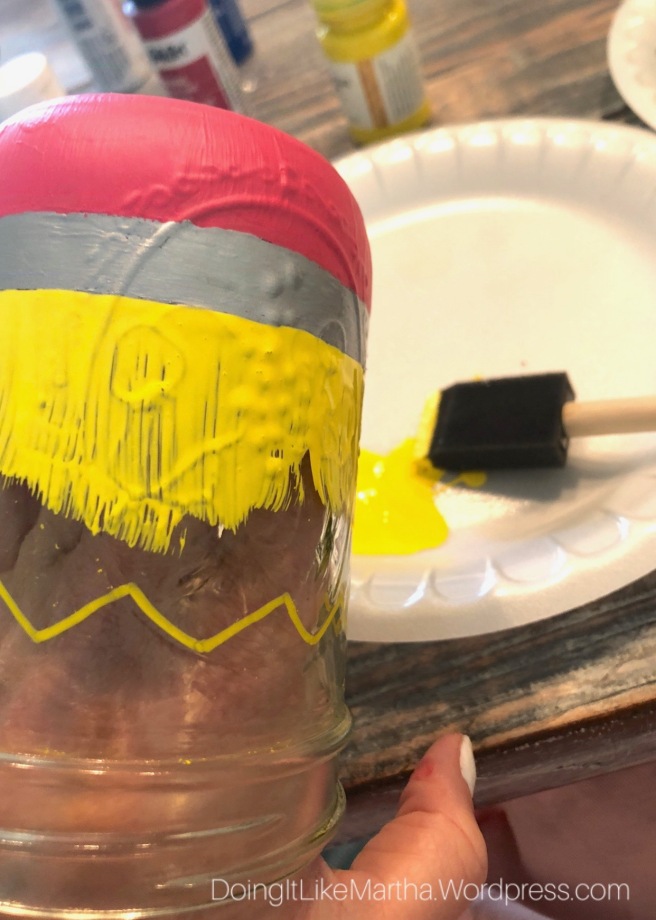
I painted the pink eraser part first, then I moved on and and grabbed some painters tape to make a clean line for the metal part of the pencil and used a sharpie paint pen because I didn’t have a grey paint or colors to make grey.FullSizeRender-2

FullSizeRender-2

FullSizeRender-1

FullSizeRender-1Then I just freehand traced an outline of the zigzag pattern on pencils with another paint pen (bought them for a previous project and had all the colors) and outlined where the yellow would go and painted that area. I let each section dry in front of the fan before I moved on to the next area. I painted the wood part brown and then I took the mixed colors (purple,blue and brown) to paint the black part of the pencil on the rim of the cup.

FullSizeRender-3FullSizeRender-3

My biggest tip for crafts like this is to let things dry in front of a fan, it will make things dry so much faster! 


For the apple, I painted the mason jar red then waited until that was dry and painted the rim brown. I took some of my green paint and painted on a leaf. You could tie some twine or ribbon and cut out a leaf shape from paper or felt if you have it and hole punch it and attach to the twine and tie that on the rim too!

FullSizeRender

I popped some pencils in them from Dollar General, and spent under $5 for each jar!

I hope you try these out and give them to the teachers in your life and it makes them smile.

FullSizeRender

All About Chalk Paint

I have been using Chalk Paint for over 5 years now and its hands down, the best way to refinish projects! I honestly can’t even count how many pieces of furniture I have used chalk paint on, but its A LOT!

When I first picked up Annie Sloan Chalk Paint, I was intrigued by the ease of the whole chalk paint process. Five years later I still love it and will only use it!

I love Annie Sloan Chalk Paint Because…

  • There is NO SANDING
  • NO STRIPPING
  • There’s virtually NO PREP work
  • There is NO ODOR, and its NON TOXIC
  • Cleanup is done with soap and water and is so fast
  • You paint INDOORS (no more messy outside projects)
  • Super FAST DRY TIME. You can legit finish a whole piece in one day!
  • Its Multi Surface, you can use it on wood, metal, brick, tile and a lot more!

With all of this being said, at some point I want to make separate posts for different projects I have done with all of their specifics. For now I will give you general Chalk Paint 411 and what you need to know about beginning a chalk paint project. I’ll be sure to link any pictures used in this to those posts when I do do them.

I want to stress, the quality of Annie Sloan paint and how it relates to the projects you take on. If you have a super sentimental piece of furniture you are redoing that’s been in your family or something like that DON’T go the cheap route and make your own chalk paint or buy some from for example, Michael’s. Its NOT worth it to ruin a piece and save $10. In the long run Annie Sloan is AMAZING quality and will be durable and last. You will never achieve the same quality with a cheaper product and its not worth it for good pieces of furniture to go that route. To me its like comparing different car manufacturers. Sure, a Mercedes and a Mitsubishi will get you from point A to point B; but the ride will be completely different! Yes, there are other chalk paint brands and other DIY things you can do to MAKE chalk paint, but I don’t recommend them. You wont achieve the same results as you would with Annie Sloan with another inferior product. Annie Sloan is the best and one quart of paint will last you for MULTIPLE projects. I can get at least 3 big projects out of one can, and with it being $38 thats a little over $10 a piece in paint. Can you imagine painting a dresser for $10?!

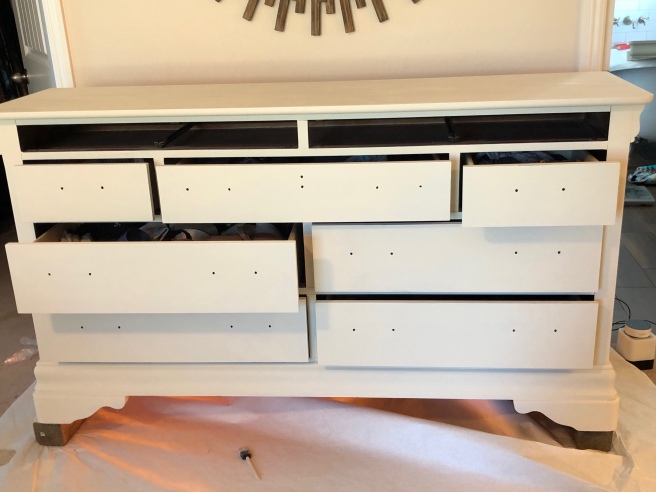
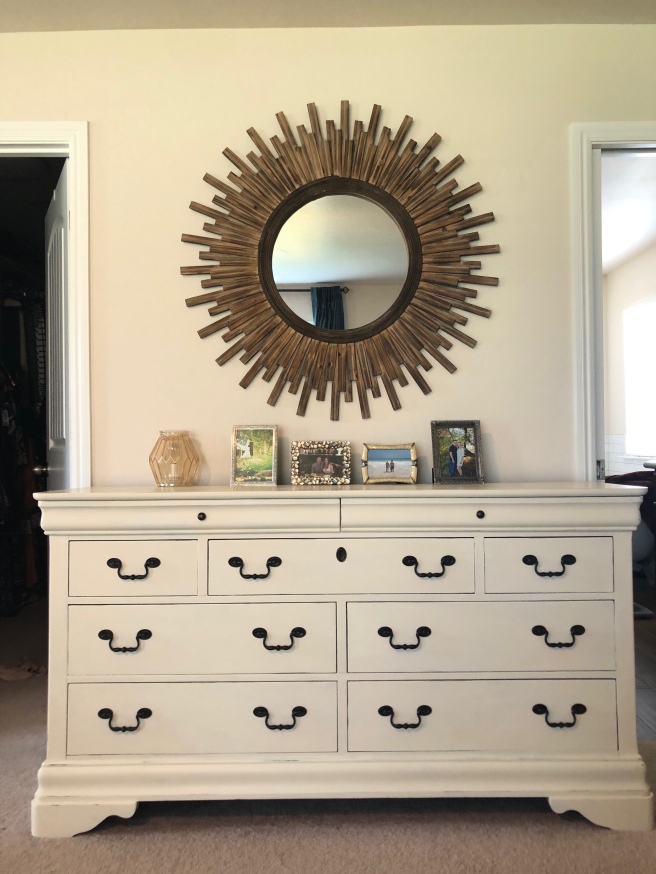
I’ll talk about my most recent redo for instructions on how to chalk paint, my old dresser. I got this when I graduated high school and it is just dated and needed to be revived.

Supply List

  • Chalk Paint (you can mix two or more colors to get a more specific color)
  • Paint brushes
  • Tarp, sheet, or construction paper
  • Painters tape if you need to tape off any edges depending on your piece
  • Clear Wax
  • Sand Paper (optional) if you are adding distressing
  • Dark or Black Wax (optional) if you are wanting to add shadowing and age the piece

Directions:

  1. If your piece is grimy, really dusty or has any kind of film take some mineral spirits and lightly wipe off the piece. You can even use water and a damp cloth to just take off any residue before you paint.
  2. Remove the hardware. You can spray paint, chalk paint, or even replace hardware. For this piece, I removed, and just replaced it. I have done other pieces where I bought new hardware, and where I used a spray paint that had paint and primer in it and sprayed existing hardware and then put it back on. Tape any edges you want protected. I was lazy and free-handed it, and could have taped around the edges of the drawers so paint wouldn’t get on the sides of the drawers.
  3. Lay down a tarp, an old sheet, or in my case, some craft paper. I didn’t move this, and just painted it right in my room. Its super easy! I took some old pieces of wood to list up the dresser and paint the feet.
  4. Take your paint and paint brush and begin to apply your first coat of paint. You will want to use a good quality brush like Purdy or Annie Sloan (if you’re buying the paint from a stockist, odds are you can pick up a brush there too). You can find a stockist here. When you’re applying the first coat, don’t worry so much about how it looks but getting a good even coverage on your piece and not applying it too thick. I promise you that your first coat will look awful! It is kind of thin and you’ll probably think you made a horrible mistake. But trust me, proceed and it will get better! Here is the first coat of paint on my dresser.
  5. Let the first coat dry. Honestly it will be dry on the side you started on by the time you get to the opposite side and start and you might not even really need to wait. Waiting 30 mins to give yourself a break would be fine and it would be ready for the second coat.
  6. Apply your second coat. Now you will see it all blending together, and not looking so messy. Apply an even and thin coat. You will be able to see if its not enough to add a little more. Chalk paint is so forgiving and really easy. You just have to try it to know what I mean. Depending on the color you chose, and the color of the piece you could be done after two coats. For this piece I went ahead and did 3 coats of Old White, since its such a light color and it was going over such a dark dresser to begin with.
  7. When its all dry, you will use Annie Sloan Clear wax. Its a really neat process, you just take a lint free rag (like a shop cloth or old sheet) and rub it into the piece like rubbing lotion on your skin. You will rub it on and then LIGHTLY wipe off the excess if it feels tacky. You can wait 24 hours and then go back and buff the piece and it will give it a slight shine to it, or leave it as it is!

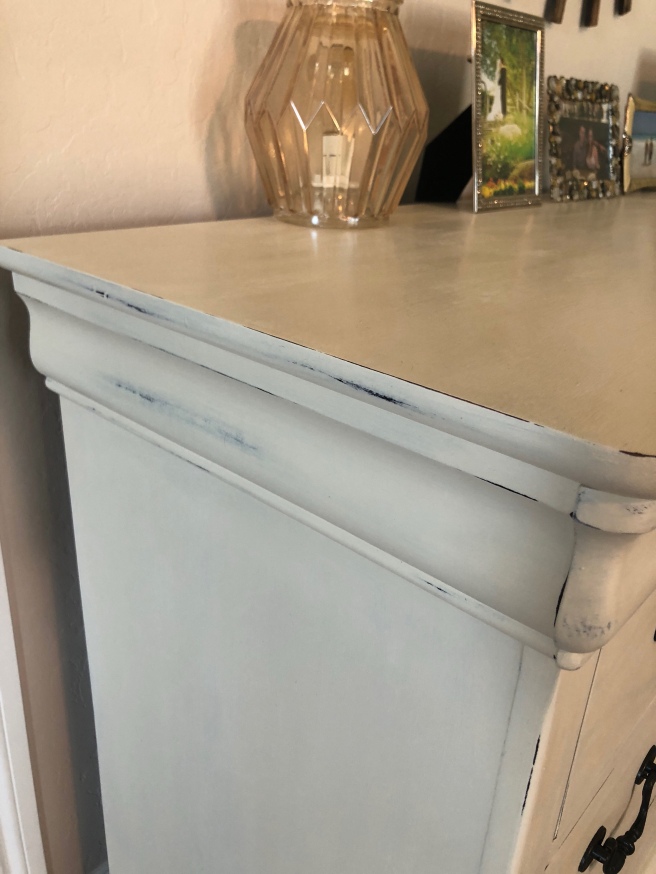
8. If you want to do any distressing, you can do it one of two ways. Take a fine grit sandpaper (220) and rub it along the edges you want to be distressed AFTER you wax, or before. I have done it both ways, and its just kind of a personal preference. All roads lead to Rome. If you distress after you apply the clear wax, then there is a little less mess in my opinion because the chalk paint isn’t flaking off as much onto the floor as you rub the sand paper of the piece. The wax seals it in, but its still workable and you can distress after the wax. You can choose how you want to do it.

Additional or Optional Steps

If you want to add dimension and age the piece, Annie Sloan sells Dark Wax (which is brown) and Black Wax. Both of these should be applied AFTER you apply the clear wax. I repeat, apply the black or dark AFTER the clear has gone on. This is simply because it can be spread around once there is that clear layer to protect the piece, if you did it directly on the paint it would essentially stain it and you couldn’t manipulate it to be lighter or darker. So apply dark or black wax in areas where there are crevices and would be shadowed from again and then apply a little clear wax over those areas to blend it in. It should create a seamless look and look like it was natural.

So step 1, apply clear wax. Step 2, apply dark or black wax. Step 3, apply a little more clear wax to blend it in if its not blending well when you first apply it. This will obviously darken the piece when you apply these and will change the paint color a little bit.

Here is a nightstand I redid, with Old White, and applied dark wax into the crevices and blended it all together with a little more clear wax. You can see its darker and has an aged look. Gel stain is applied to the top of the dresser for a different look, and I The hardware on it was originally brass, and I removed it and spray painted the handles with a Rustoleum flat black and put them back on. I plan on posting about these processes and will link that when I do. Its amazing as well. You can always add more if you want it darker, or remove it like an eraser with clear wax if its too dark. Its all preference based so just step back and look at it as you go adjust it if you need to. Doing this over that first layer or clear wax makes this possible.

I hope this answers some chalk paint questions you may have had. It really is such an easy process with great results so give it a try. I’ve refinished bookcases, tables, desks, dressers, nightstands, mirrors, shelves, and even brick with chalk paint. Its AMAZING. I’ll be sure to make more posts soon about other chalk paint projects!

Share this with your friends if they’d love to learn more about chalk paint and tag Doing It Like Martha on FB or IG!

If you want to check out Annie Sloan’s website to see the products or learn more about the techniques its a great resource!

DIY Color Me Mine Project At Home

IMG_3835

It’s secret that I’m obsessed with doing crafts at home, and I love the idea of Color Me Mine… but its kind of far from my house and I have done a couple projects where I paint a ceramic piece and bake it in the oven and I don’t have to leave my house to do it!

So if your kids are misbehaving you didn’t expend energy getting out of the house to go to color me mine and come pick up your finished piece a couple days after you leave.

All you need is a ceramic piece, and enamel paint!

IMG_3836

I found these ceramic pumpkins at Hobby Lobby when I was getting some fall decorations and HAD to buy them. I like doing crafts with the kids, as well as alone. This was perfect because I would display their work with my fall decor.


You take your paint and paint the piece,

FullSizeRender-8FullSizeRender-7

and when you’re done just pop it in the oven on a cookie sheet.

When you finish let it sit inside while it preheats to 350.  

Let it bake for 30 mins and take it out to cool.

FullSizeRender-5

If you have paint pens from another project have your kiddo sign the bottom or back and  write the year its made before you put it in the oven to cure.

You can do this for so many holidays and occasions. Hopefully you do this and have some fun with your kids!

FullSizeRender-6