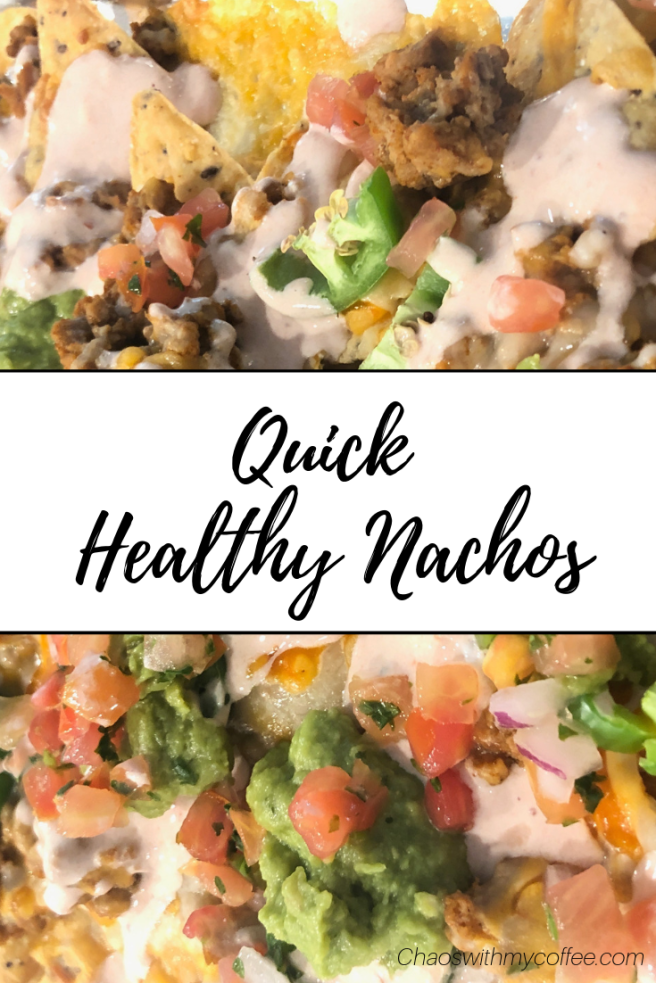
Quick Nachos

Quick Healthy Nachos.png


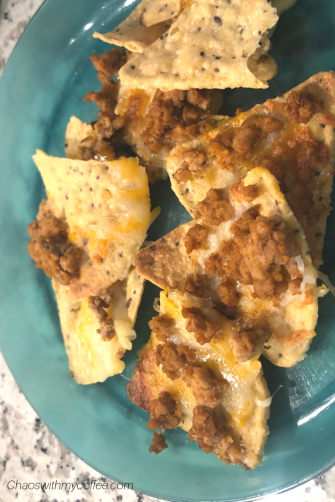
Nachos are a big deal in my house. We love nachos, and if we could, we would eat them for every meal. I think we still may try to make breakfast and dessert nachos because we love them so much!

(How good does a cinnamon sugar chip with berries and cream sound?! maybe a drizzle of chocolate- I’ll add that to my to-do list and will report back.)


ANYWAY, I wanted to share our quick and easy nacho recipe with you.

They are a healthier option because we always use ground turkey when we cook any kind of Mexican food at home, and because we use a multigrain chip from Costco. It’s definitely an easy swap without sacrificing flavor.

You can make them tons of ways with different meats or toppings. We like to make loaded spicy ones for us, and simple meat and cheese for the kids.

Foster Farms Organic 93/7 Ground Turkey - 16oz


Quick Healthy Nachos (2) Quick Healthy Nachos (1)

Directions:

  1. Preheat your oven to 350 degrees
  2. Grab a cookie sheet, and line with tin foil (for quick clean up) and spread your chips on top of the foil.
  3. Layer your cheese(s) of choice, as little, or as much as you like. We use a mix of shredded sharp cheddar cheese, white cheddar, and/or Mexican.
  4. Place your meat on top. ** Cook meat beforehand, or prepare and place cooked on top. ** We use McCormick taco seasoning in a giant bottle since we make taco salads like 3 times a week and use a lot!
  5. Place any additional toppings you want to go on them in the oven. I have put some Habanero hot sauce from Trader Joes, or taco bell fire sauce on them and jalapeños and baked.
  6. Bake for 5 minutes or until the cheese is melted, just keep an eye on them.
  7. Take them out and place the rest of your toppings on them.

*Cilantro

*Chives

*Jalapeños (if you didn’t bake with them on in the oven)

*Salsa or fresh Pico De Gallo

*Sour Cream MIXED with hot sauce, this is a GAME CHANGER! It adds so much flavor and its amazing. You can always switch up the type of taco sauce or hot sauce that you add. Thin with water, maybe 1-2tsp at a time, then add hot sauce and mix. It will be a runnier consistency so it can be drizzled on.

*GUAC- always guac! I LOVE the guac from Trader Joes or Wholly Guacamole, or Walmart brand (when that gets subbed in my grocery pickup orders)

Enjoy!!!

-Hannah (1)

Easy Dessert Cups For Kids

My boy’s birthdays are one week apart (and 3 years) so I’m in full birthday mode at the same time for both kids and then I’m done until the next year.

One thing I did this year when I was taking treats to their classes that was a game-changer was to use CUPS WITH LIDS!

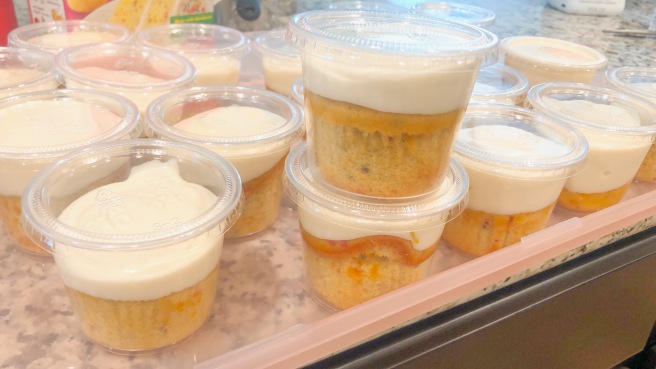
Fair warning, I didn’t take fancy photos of either treat in a cup. These treats were not super planned out and made quickly (which is how mom life goes).

IMG_2364

IMG_2368

I made two different treats, both super easy and it made transporting them to school and handing them out a breeze.

Option 1- A cupcake in a cup.

Option 2- Pudding or mousse in a cup (in this case, dirt cups)

You can washi tape a spoon to the top or side of the cups and (not totally necessary) and just hand out the cups.

IMG_2363

I used boxed Annie’s confetti cake mix that I had in my pantry already to make cupcakes for my kindergartener.

For the cupcakes, I did the following:

  1. I plopped the baked and cooled cupcakes in the cup.
  2. I made a powdered sugar frosting. I piped that on top and shut the lid. ** For these I wasn’t worried about how the frosting looked and that was a huge timesaver, I made (with adding milk) a nice loose (and still thick) consistency of frosting that would be easy to eat when they were in class.

Frosting recipe is posted below.


For my 3rd grader, I made dirt cups.  This was a combination of oreos in between layers of a chocolate mousse that was easy to mix up. I put some black forest organic gummy worms on top and shut the lid.

IMG_2368


Dirt Cups

  • Difficulty: easy
  • Print

Ingredients

  • 1 package of Oreo’s, crushed
  • 1/2 stick butter, softened
  • 1C powdered sugar
  • 8oz cream cheese, softened
  • 3 1/2 cups milk
  • 2 packages of Chocolate Instant Pudding
  • 12oz Cool Whip
  • Gummy worms

Directions

  1. Crush package of oreos, I usually do this in a gallon freezer bag with a rolling pin. Then set aside.
  2. In  separate bowl, mix butter, powdered sugar, and cream cheese until smooth.
  3. In another bowl, mix dry pudding mix and milk together. Fold in the Cool Whip.
  4. Pour cream cheese mixture into pudding mixture. Mix them together.
  5. In your individual cups layer crushed oreos, then pudding, oreos, pudding, as many layers as you want. As long as you divide it up, it will look like dirt. You could start with pudding, then dirt, and layer. The LAST layer needs to be dirt and you will place the gummy worms in the cup and put the lids. Now you’re done. Just serve and enjoy!

Powdered Sugar Frosting

  • Difficulty: easy
  • Print

Ingredients

  • 2 cups powdered sugar
  • 1/4 cup (1/2 stick) unsalted butter, softened
  • 3 T to 4 T milk
  • 1 tsp vanilla extract
  • If needed, food coloring (optional)

Directions

  1. Beat the powdered sugar and butter in a medium bowl with an electric mixer on medium-high speed until the mixture is light and fluffy.
  2. Beat in 3 tablespoons milk and the vanilla extract. Watch the consistency. If you want to pipe frosting and for it to maintain shape you want it the consistency a little thicker than toothpaste. It will hold its shape, but will still be spreadable. For THIS dessert, I thinned until it didn’t hold its shape so it would just be creamy on top of the cupcake in the cup. Add milk until desired consistency. Tint the frosting with the food coloring, if desired.


I’d love to see if you you try this out, be sure to tag @chaoswithmycoffee on Instagram and hashtag #chaoswithmycoffee

-Hannah (1)

Summer Activity: Ice Cream in a bag

IMG_2258.jpeg

Now that it is summer, I try my best (and this doesn’t always work out) to do some sort of craft or activity with the kids. I’m always looking for fun ways to occupy their time outside of a screen.

A couple years ago we made ice cream in a bag, and I had pinned the recipe and did it again today and it was so fun and delicious! Credit to Scatteredmom and her blog for the recipe.

We made both the vanilla AND strawberry flavor and honestly you could double each recipe because its so good!

Next up I want to make blueberry ice cream instead of a strawberry.

You will work hard for this ice-cream shaking it for 5-10 minutes, but its worth it, and like I said it occupied the kids!

** If you have multiple kids, and/or extra hungry adults double the recipe.

Here is what you will need.

Ice Cream In A Bag

Ingredients

  • 1/2 cup heavy cream
  • 1/2 cup half-and-half or milk ( I used whole milk I had on hand)
  • 1/2 tsp vanilla extract
  • 3 tbs of pureed strawberries (to make plain vanilla, leave out the strawberries)
  • 3 tbsp of sugar  (less if you want your ice cream less sweet)
  • ice
  • rock salt for ice cream
  • gallon size Ziploc bag
  • quart size Ziploc bag
  • kitchen towel

Instructions

  1. Mix together the milk, cream, vanilla, sugar and strawberries in the quart size bag.  Close the bag and make sure it is completely sealed.
  2. Fill the gallon-size bag 3/4 the way full with ice, then add 1/4 cup of rock salt to the bag of ice.
  3. Place the smaller (sealed) quart size bag of ice cream into the larger gallon bag and seal the bag. (you will have a bag inside a bag)
  4. Wrap the kitchen towel around the bag and start shaking the bag! Enlist your kids to do some crazy shaking and get some of their energy out.
  5. Open the bags carefully, be careful to make sure water doesn’t get inside the ice cream. You don’t want any ice water in your ice cream!

Add any toppings you want, one of mine added chocolate sauce.

Serve immediately and enjoy.


I’d love to see if you you try this out, be sure to tag @chaoswithmycoffee on Instagram and hashtag #chaoswithmycoffee

-Hannah (1)

Amazing Avocado Dip

IMG_1883

I ran across this recipe on Pinterest and read the full recipe on the Listotic blog.  It will definitely be something I make often! The best thing, its only a few ingredients! 

It was a hit for Bachelorette viewing night too. Its so simple and can be made quickly! I tweaked her recipe, by adding real red onion vs. onion powder, and I used cilantro instead of parsley to give it more of a guac feel.


Amazing Avocado Dip

Ingredients

  • 3 large avocados (chopped into small chunks)
  • 1 pint cherry tomatoes (chopped into small chunks)
  • 4 ounces plain crumbled feta cheese
  • 1 small bunch of fresh cilantro (chopped fine)
  • 1 tbsp olive oil
  • 1.5 tbsp red wine vinegar
  • 1/2 tsp or more of garlic powder
  • salt and pepper to taste
  • 1/4 cup chopped fresh onion or 1 tsp onion powder (I used red onion)
  • 1 bag tortilla chips for serving


Directions:

  1.  Combine all of the ingredients together in a bowl, except for the avocados.
  2. Our recipes differed here- I then added the avocados and I mashed them to a chunky but still semi solid consistency with the rest of the ingredients. I refrigerated for maybe 2 hours before serving.

Her Step 2- Refrigerate for a few hours or overnight, and then chop the avocados and gently stir them in just before serving.

Your choice, it feels like a tomato/tomatoe situation, with either result being a delicious dip!


Enjoy!!

XoXo

-Hannah

Paleo Ranch Seasoning Mix

IMG_9113.PNG

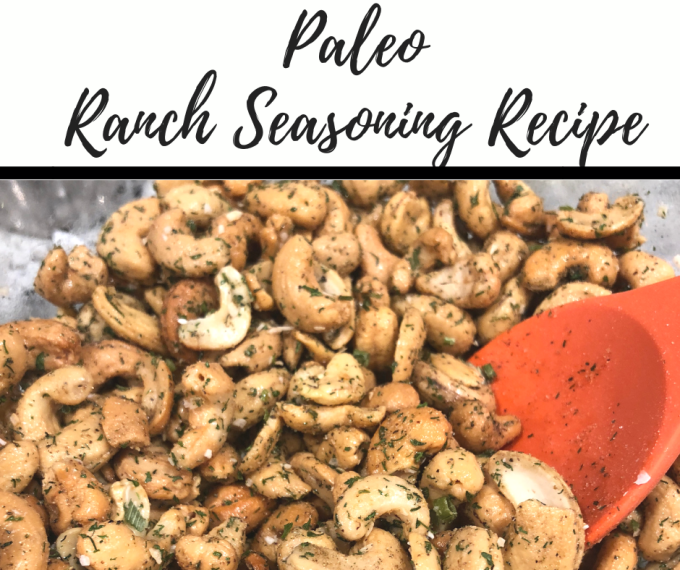
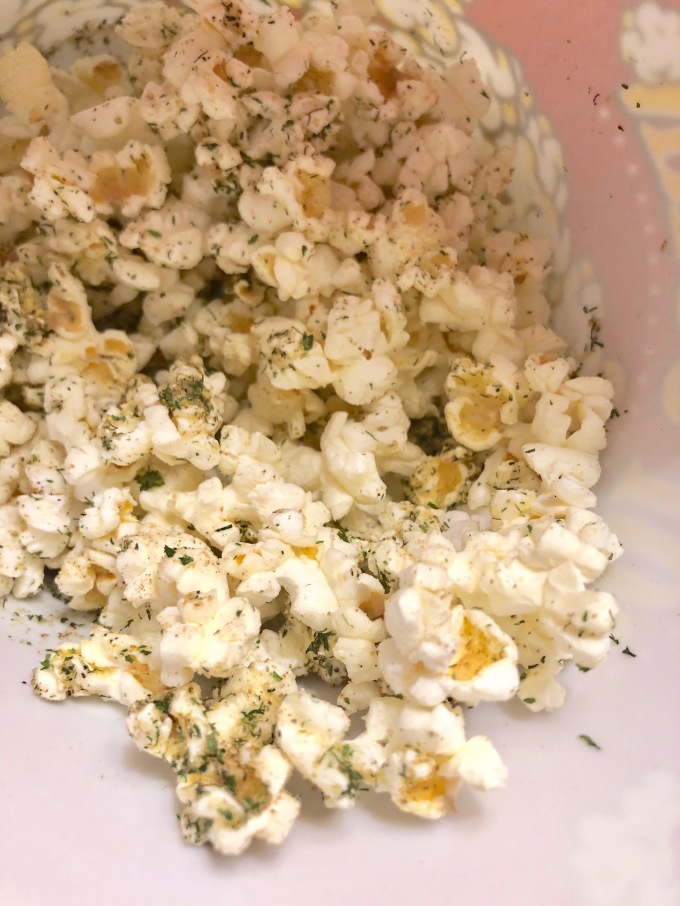
This is a go-to recipe in our house. I love using this mix to put with cashews, or almonds. It also is AMAZING on fresh popped popcorn, and will turn your favorite snack into a gourmet one!

This recipe makes more than one recipe’s worth- so you will have leftover. Store in an airtight container and use it over and over again until it’s gone!

IMG_8572.jpeg

Paleo Ranch Seasoning Mix Recipe

Ingredients:

  • 2C raw cashews or nut of your choice (omit if just making seasoning)
  • 1T Avocado Oil
  • 1 1/2T of seasoning mix (directions below) for cashews

Seasoning Mix Ingredients: 

  • 2T dried parsley
  • 2T dried chives
  • 1T dill weed
  • 1T garlic powder
  • 1T onion flakes
  • 1T celery salt
  • 1tsp pepper

Mix well and store in airtight container

Directions:

To use seasoning with nuts, preheat oven to 400 degrees.

Put cashews in large bowl, drizzle with avocado oil, and sprinkle seasoning mix (1 1/2T) and mix well.

Line baking sheet with parchment paper

Place cashews on baking sheet and spread out evenly.

Bake for 8 minutes.

Stir

Bake for another 8 minutes. Watch them closely to make sure they don’t burn. If they are getting too brown, remove early from oven.

Remove and allow to cool. Store in airtight container.

For popcorn

Melt 1T or so of butter, then make or pop a bag of popcorn. Drizzle butter over to coat the freshly popped popcorn, and then add about 1T (or to taste) of seasoning mix to the popcorn and toss. This is SO delicious!

Recipe Taken from realsimplegood.com

The Best Chocolate Chip Cookie Recipe

IMG_7849.PNG

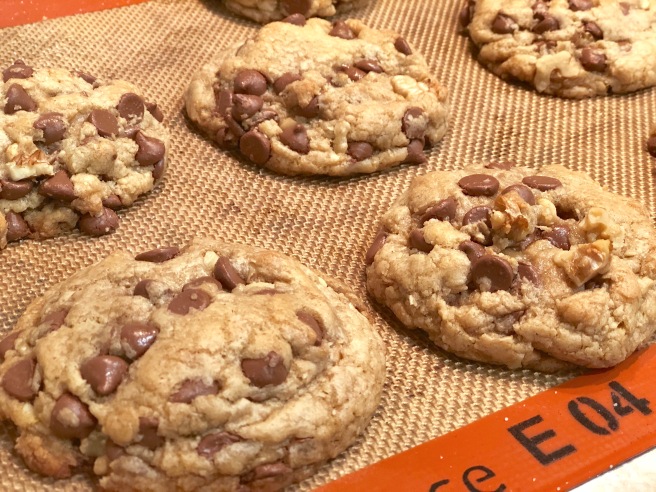
I don’t normally love chocolate chip cookies, but this recipe I tried a couple months ago is seriously THE BEST I have ever had. They look like fancy bakery cookies and everyone loves them. I love that these can be made without getting my big kitchenaid mixer out, I love that thing but I’m kind of lazy. Just use a spatula, or spoon, and some bowls!


They are a copy cat recipe for Double Tree cookies at their hotel, and they wont disappoint!

What I have been doing lately, and I posted about this in my Snickerdoodle recipe post, I leave the cookies in the fridge and take out a handful at a time to bake them. So if you have a family of 4, take out 8 at a time and bake them each day for about a week. That way you will always have fresh baked cookies and they wont get stale!

These cookies require you chill them for 4 hours up to overnight before baking, and I will be putting some in the freezer during the holidays in a ziploc bag and pulling them out and setting them in the fridge before I bake so it will make putting cookie plates, or needing them for random things like class parties or for relatives easier!

Things that make these cookies better:

  • TONS of chocolate. These cookies have 3 cups of chocolate chips, which is at least double or typical recipes. I like milk chocolate and I used milk chocolate chips, but you can use minis, semi-sweet, a mixture, or even dark chocolate for an even richer cookie.
  • CHILL THE DOUGH. I know. It’s annoying, and when you are done mixing them you want to pop them in and eat them! It takes a long time. But you MUST. Otherwise these will spread and not be thick and gooey. Scoop baseball sized balls of dough that are 1/4 cup each and chill them at LEAST 4 hours (or overnight) before baking. You will learn after making this to not expect them til later, and will be ok waiting, I promise.
  • UNDER-BAKE them, this is tough. They’re done just when the top looks done and you don’t want to keep baking them until they are brown. They will still be gooey in the center, and it will probably freak you out. THAT’S the secret sauce to the best chocolate chip cookie: THE GOOEY CENTER.

The Best Chocolate Chip Cookie Recipe

  • Servings: 20 cookies
  • Difficulty: easy
  • Print

These cookies are enormous, gooey, full of chocolate and will be the best thing you ever ate. Taken from the Crazy For Crust Blog

Ingredients

  • 1/2 cup old fashioned oats
  • 2 1/4 cups all-purpose flour
  • 1 teaspoon baking soda
  • 1 teaspoon salt
  • 1/4 teaspoon ground cinnamon
  • 1 cup unsalted butter melted
  • 3/4 cup brown sugar packed
  • 3/4 cup granulated sugar
  • 1 tablespoon vanilla extract
  • 1/2 teaspoon lemon juice
  • 2 large eggs
  • 3 cups chocolate chips use your favorite kind
  • 1 1/2 cups chopped walnuts
  •  optional: sprinkle a little salt, or sugar over each cookie before baking

Instructions

  1. Place oats in a small food processor or blender and grind until they turn powdery. Place them in a medium sized bowl and whisk in the flour, baking soda, salt, and cinnamon. Set aside.
  2. Stir together melted butter, brown sugar, and granulated sugar until smooth. (No mixer needed – just use a wooden spoon or spatula!) Stir in vanilla, lemon juice, and eggs. Stir until smooth, then stir in flour mixture. Mixture may be slightly lumpy because of the ground oats. Stir in chocolate chips and walnuts.
  3. Line a cookie sheet with wax or parchment paper or a silicone baking mat. Scoop 1/4 cupfuls of the dough into balls and place on the cookie sheet. You do not need to space them; this is just for chilling. Cover well with plastic wrap and chill at least 4 hours or overnight before baking.
  4. Preheat oven to 350°F. Place cookies well spaced on cookie sheets lined with parchment paper or silicone baking mats. Slightly depress each ball with the palm of your hand.
  5. Bake for 13-17 minutes. Do not over bake – these are best a bit under done.


IMG_7838.jpeg

I hope you enjoy these and this becomes a staple in your household cookie recipe arsenal.


The Best Snickerdoodle Cookie Recipe

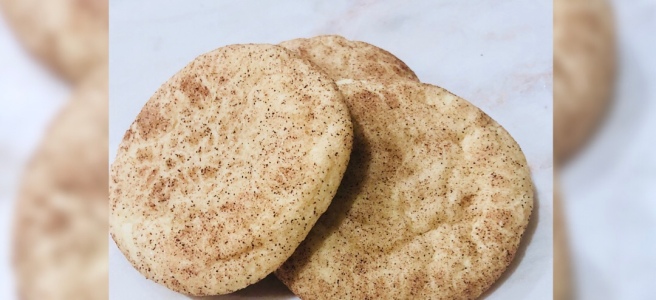
I have been making these cookies since I was a little girl with my mom. Growing up I remember rolling the cookies into balls, dropping them into some cinnamon and sugar and gently flattening them with this small glass we used only when making these cookies.

I’m UBER picky with snickerdoodles because of this and frankly because these are SO good and better than most. Its really simple, and always tastes so good!

The Best Snickerdoodle Cookie Recipe

  • Servings: 4 dozen
  • Difficulty: easy
  • Print

Ingredients

3 3/4 cups All Purpose Flour

1/2 tsp Baking Soda

1/2 tsp cream of tartar

1/2 tsp salt

2 sticks of butter

2 cups sugar

2 eggs

1/4 cup milk

1 tsp vanilla

For rolling:

3T sugar and 1 tsp cinnamon

Directions:

Preheat oven to 375 degrees

1. Combine the four, baking soda, cream of tartar and salt in a bowl and set aside.

2. In a separate bowl beat the butter for 30 seconds. Then add sugar and beat until fluffy.

3. Add eggs, milk, and vanilla. Beat well.

4. Gradually add dry ingredients to wet mixture.

5. In a separate small bowl mix cinnamon and sugar to roll cookies in.

6. Roll dough into 1” balls, roll into cinnamon sugar mixture and place on a cookie sheet with a silicone baking mat or parchment paper 2” apart. You can use a cookie scoop if you have one.

7. Take a small glass and use the bottom to GENTLY flatten the tops of cookies before putting in the oven.

8. Bake at 375 for 8 mins. Let cookies cool for 5 mins on sheet then place on cooling rack.

Cookie Hack

My friend, fellow boy mom and cookie lover told me her cookie dough trick recently. She told me to not bake all the dough, bake a dozen or so, put the rest in a storage container and store in the fridge. Throughout the week bake a few cookies, so you don’t feel like you bake cookies and half go stale. Every time you bake them they are fresh baked! Its genius! I did it this week with the snickerdoodles, and its awesome! So now I bake a few and they are fresh cookies and I love having them to put in the boy’s school lunches.

I know you will love them as much as we do!

My Favorite Quiche

I’ll begin with the fact that I love eating breakfast! With that being said, no I don’t eat quiche everyday, even though that sounds like a divine life.

I’m not quite sure how my love of quiche even manifested… but its my go-to breakfast dish. Whether I’m attending a MOPS meeting and have to bring a hot dish, making brunch or just want something delicious for home. This recipe does NOT disappoint. 

I found this quiche recipe from an episode of Pioneer Woman that I watched and knew I had to make it. This quiche is called “Cowboy Quiche” and my husband and everyone who has eaten it have loved it!

DoingItLikeMartha.wordpress.com.png

I love that you just need a few ingredients: Eggs, Butter, Onion, Bacon, Heavy cream, Cheese, and a pie crust. Ingredients and printable directions are listed at the bottom of the post.

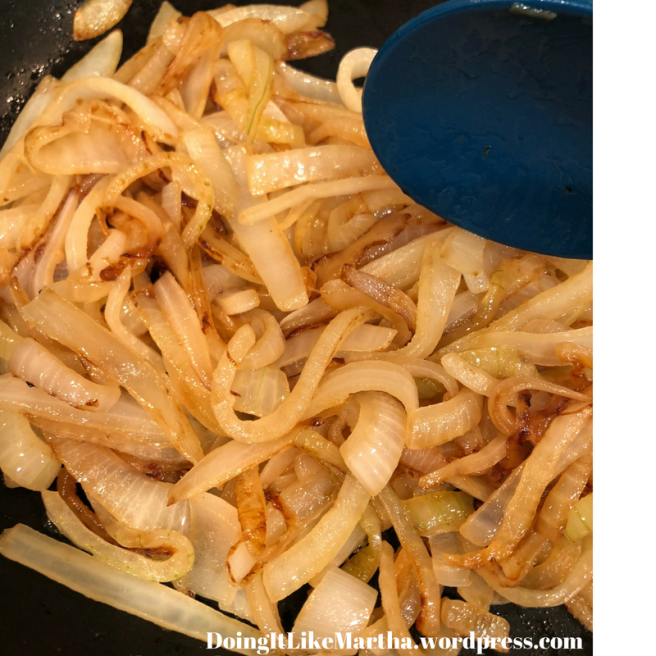
First you cut up an onion, and sauté them until they are a gorgeous golden color. You will cook them over low heat for about 15-20 minutes stirring them on and off. When they are done set them aside to cool.

DoingItLikeMartha.wordpress.com-3.png

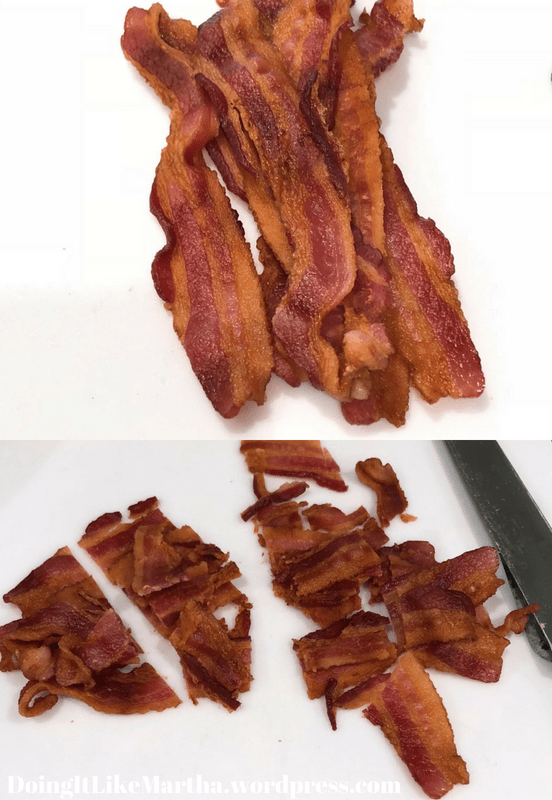
Cook 8 slices of bacon, and then roughly chop them up. Don’t get them extra crispy while you are cooking them, you want them somewhat chewy because they are going in the egg mixture and will cook some more in the oven. Be sure to have some extra slices on hand for snacking, I’m talking about you or any tiny hands. Somehow bacon disappears in my house, I’ll let you decide if its from adults or hungry boys. 

DoingItLikeMartha.wordpress.com-4

Combine eggs and heavy cream

Whisk them together

Add in Salt and Pepper to taste

Roll out your pie dough, or grab your prepared pie crust you have from the store. I always keep a couple in my freezer to have on hand for pies, quiche, etc. Just let it thaw for a bit and then roll it out.

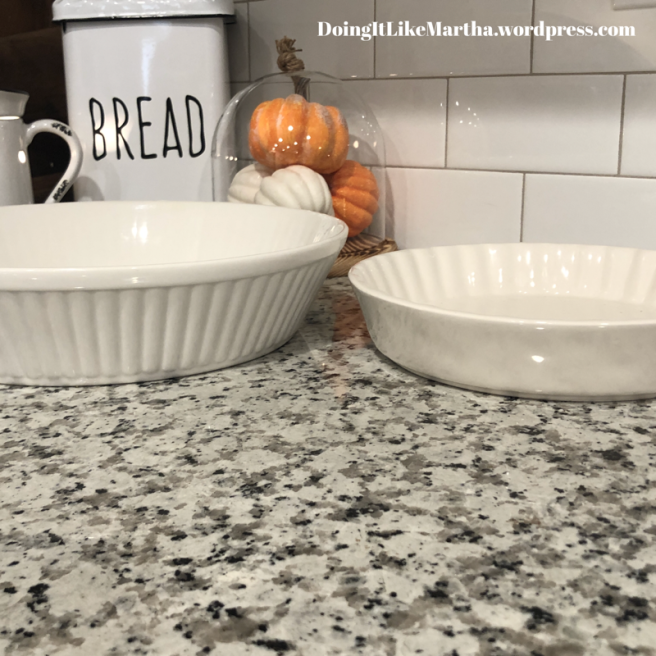
Lay the crust over your pan, and use a DEEP DISH pan for this recipe.

It makes a lot of quiche and you’ll want to use a bigger pan for one quiche. I have a Martha stewart pan thats extra deep that I used.IMG_3384You can use two regular pie crust pans and bake two (freeze one, or eat two, no judgement) you can see how the Martha Stewart one I used is wider and deeper than a regular pie pan. IMG_3385.PNG
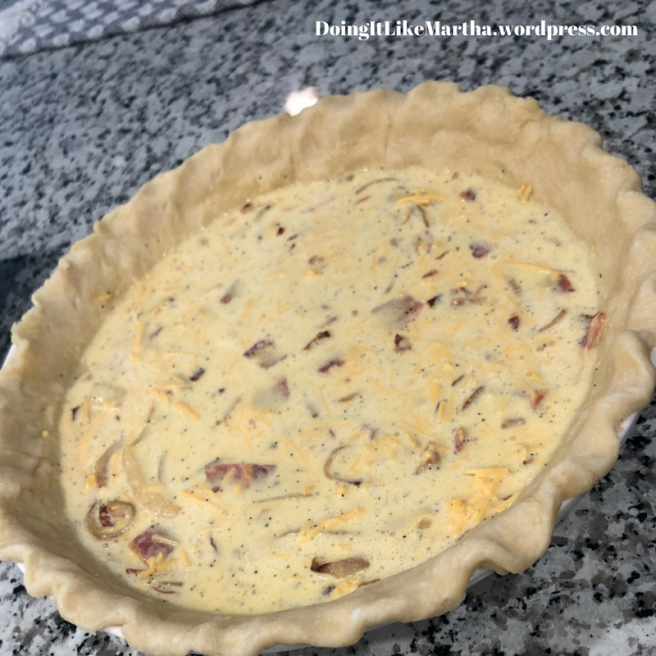
Throw your onions and bacon into the egg mixture, add cheddar cheese (try not to drool into the mixture) and then pour into the pie dish with your pie crust.

DoingItLikeMartha.wordpress.com-5.pngDoingItLikeMartha.wordpress.com-6.png Bake at 400 for 40 to 45 minutes, with foil lightly tented over the top. Take the Foil off and cook for 10-15 minutes more until the crust is golden brown and the center is slightly still jiggly. It will continue to cook when you take it out of the oven.  If it looks like it needs more baking time, just pop the foil back over the top so the crust doesn’t get too dark and let it keep baking. Let it rest for 15 minutes after you take it out of the oven before you slice it.

Voila!

DoingItLikeMartha.wordpress.com

Enjoy this amazing dish, and print it out down below.

Pioneer Woman Cowboy Quiche

  • Servings: 10
  • Difficulty: easy
  • Print

Ingredients

  • 1 whole Unbaked Pie Crust (enough For A Deep Dish Pan)
  • 2 whole Yellow Onions, Sliced
  • 2 Tablespoons Butter
  • 8 slices Bacon
  • 8 whole Large Eggs
  • 1-1/2 cup Heavy Cream Or Half-and-Half
  • Salt And Pepper, to taste
  • 2 cups Grated Sharp Cheddar Cheese

Preparation

Fry the onions in the butter in a large skillet over medium-low heat for at least 15 to 20 minutes (maybe longer), stirring occasionally, until the onions are deep golden brown. Set aside to cool.

Fry the bacon until chewy. Chop into large bite-sized pieces and set aside to cool.

Preheat the oven to 400 degrees. Roll out the pie crust and press it into a large fluted deep tart pan (or a deep dish pie pan).

Whip the eggs, cream, salt and pepper in a large bowl, then mix in the onions, bacon, and cheese. Pour the mixture into the pie crust.

Place the pan on a rimmed baking sheet, cover lightly with aluminum foil, and bake it for about 40 to 45 minutes. Remove the foil and continue baking for 10 to 15 minutes, or until the quiche is set and the crust is golden brown. (The quiche will still seem slightly loose, but will continue to set once remove from the oven.)

Remove from the oven and allow to sit for 10 to 15 minutes. If using a tart pan, remove the quiche from the pan, cut into slices with a sharp serrated knife, and serve!

Baking Simple Two Tier Cakes

Image-1

Baking can be SO intimidating, but after several years of baking (and lots of trial and error) its definitely become something that has saved me lots of money in the long run. If you plan on making cakes for parties for your kiddos, holidays, or family get togethers it will really come in handy. So get in there and try it!

I want to start by saying, I did NOT bake this completely from scratch. I have done it, its great, but using a cake mix or doctoring up a boxed cake mix always tastes just as good. The key, in my opinion is the frosting. Making that from scratch is super easy and is well worth it. I will be posting the recipe in this post.

My oldest wanted an oreo cake, so I made two batches of frosting. One being regular buttercream, and the other with crushed oreo cookies to give each cake an oreo buttercream center.  One cake was chocolate, and one was vanilla, both with oreo buttercream filling and buttercream frosting- and I’ll be sharing this recipe. It is my go-to and favorite buttercream recipe of all time!

I used this cake mix from Target, it was honestly THE BEST box cake mix I had ever had and I didn’t doctor it up (more on that later in the post), I just followed the directions. I try as much as possible to stay away from unenriched foods, without folic acid because of some genetic things with my family so I always read the label and there are some brands I always use now because of that. This was one of them.

Image-1-1

I baked two 9 inch round cakes, greasing the pans with the flour baking Pam before putting them in the oven.

Take them out, let them cool for 10 minutes, then flip them over on a cooling rack and let them fully cool before frosting.

While the cakes are cooling, start making your frosting. This is the recipe I used, and ALWAYS use. This works for cakes as well as cupcakes. You can add color or leave as is!

For the oreo buttercream, I just took 15 oreos, put it in a galloon freezer bag and had my youngest crush them for me. When one of the two batches was done, I just folded the oreo cookies into the frosting and used that for the middles of the two cakes. The left overs were consumed on top of MORE oreos by the boys. 

Image-1-4.jpeg

Buttercream Frosting

  • Difficulty: easy
  • Print

Ingredients

  • 2 Sticks of Butter, softened to room temperature. I use salted
  • 1T Corn syrup
  • 4C Powdered sugar
  • 1tsp Vanilla extract
  • 2T Milk (whole or 2%)

Directions

  1. Put two sticks of butter, 2 T milk and 1tsp vanilla in the bowl of a stand mixer (a hand mixer will work if you don’t have a stand mixer). Mix on LOW speed just until it starts to come together, about a minute. Scrape the sides of the bowl with a spatula. Increase to medium low speed and beat for about another minute. After this it will be combined, with a little liquid at the bottom.
  2. Increase the mixer speed to medium. Beat for about another or minute or so. When it looks creamy, and combined you’re ready for the next step. 
  3. Add 4 cups powdered sugar. Beat on low speed until sugar is just barely incorporated. Now scrape down the sides of the bowl, and INCREASE speed SLOWLY to medium. Beat for about a minute.
  4. Now you will want to check your consistency. This is very important because if your frosting is TOO THICK, it will not spread well. Take your spatula and move it around in the frosting, if it does not glide through the frosting, add about a tablespoon of corn syrup and beat on medium for about 30 seconds. You can do this regardless, it will safeguard you and make it nice and spreadable.

The frosting should hold it’s shape without being too thick, think of toothpaste consistency.  If it is too runny, it will slide off and will not stick to your cake. If you are wanting to pipe some decorations on your cake/cupcakes, now would be the time to set a little of this aside in a separate bowl to use later.

5. Once you get your frosting to a good, spreadable consistency, increase mixer speed to medium high and beat for one minute. This will get your frosting nice and fluffy. Now thats it! You’re Done! This is SO delicious, and I know you will agree!

Coloring Your Frosting

If you want to add any dye (or multiple) to you cake, separate if you want more than one color into little bowls and add whatever dye you like to each bowl. Then you’re ready to frost and assemble!

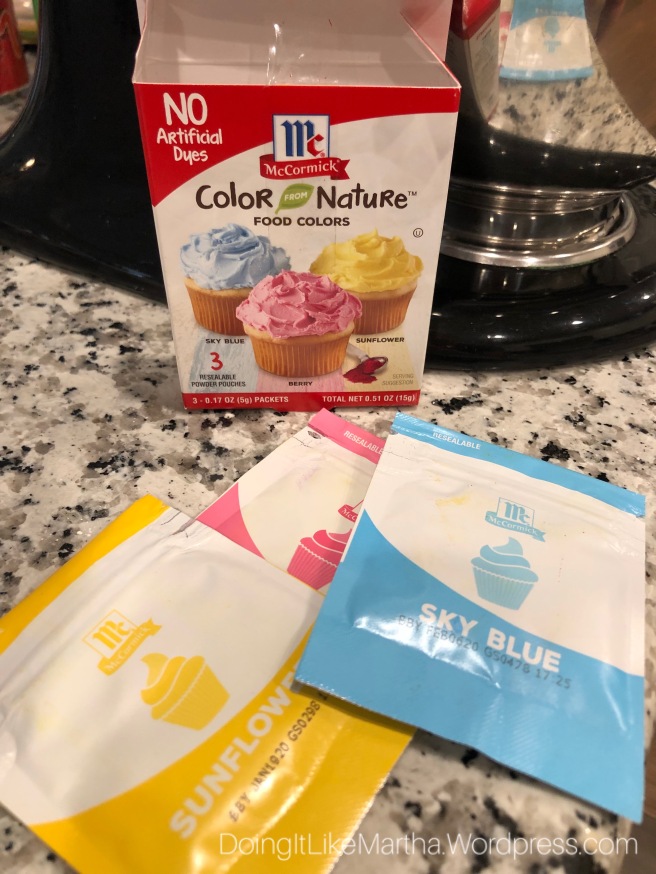
Because I try to avoid dyes I used this powdered natural dye from McCormick, and it worked great. I bought it on Amazon and there are some other natural gel food coloring available there as well if you don’t want to search high and low in stores. You can use the regular gel food coloring as well.

Image-1-1.jpeg

Image-1-2.jpeg

Assembling your cake 

Before I started doing anything with the cakes…

  • I took my bread (serrated) knife and gently leveled the top of the cakes. I got down to eye level with the cakes and GENTLY took my knife and ran it over the top of the cakes evenly to eliminate the minor curve the cakes get when baking. When I was done, I was left with two pretty flat and even cakes.
  • I put a small dollop of the frosting on the cardboard, then set one of the layers on it to secure the bottom piece. Then I took the bottom cake piece, and set it on a cake server (with a  cake cardboard underneath).
  • I then added the top piece to the one attached to the cardboard and with the filling spread on. Think of it like putting a PB&J together. Put it on and TADA, all ready for the crumb coat.
Here is a picture of the smashed up Oreo pieces folded into (one of the two) batches of frosting I made.

IMG_9918

“PB&J” step done. 

IMG_9919

  • Now comes something called the “CRUMB COAT”.  Crumb coat is the first layer of frosting, and there will be bits of crumbs in it because the cake gets another layer of frosting.
  •  You take your frosting with your frosting spatula, and lightly, make an almost messy look to the cake as you spread it all over. I like to start on the sides, spread the frosting all around, not being concerned with the crumbs because THEY WILL GET COVERED UP. Then work my way to the top, and spread it out evenly, smoothing out an ridges on the edges of the top, but you don’t need to make it perfect in this step.
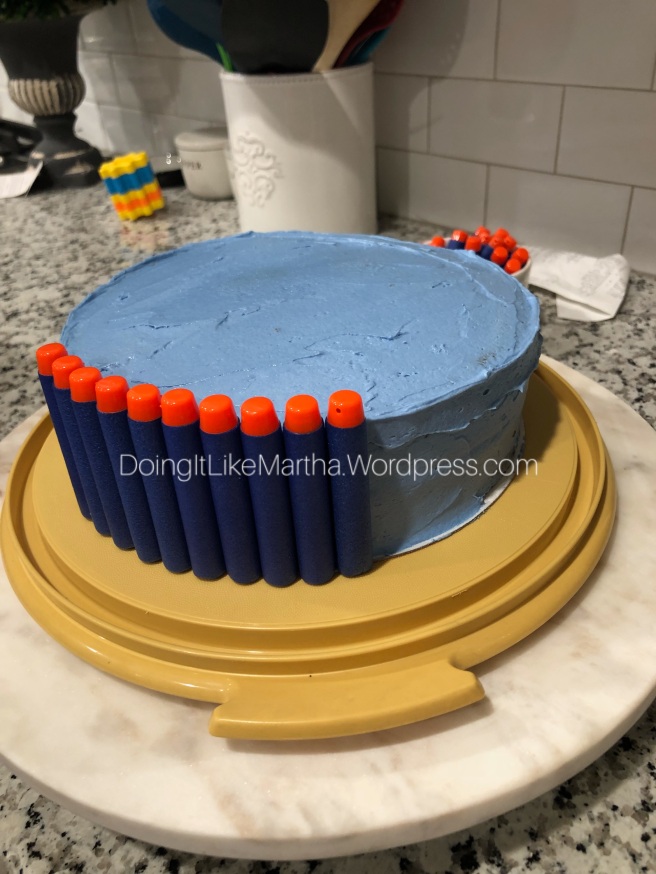
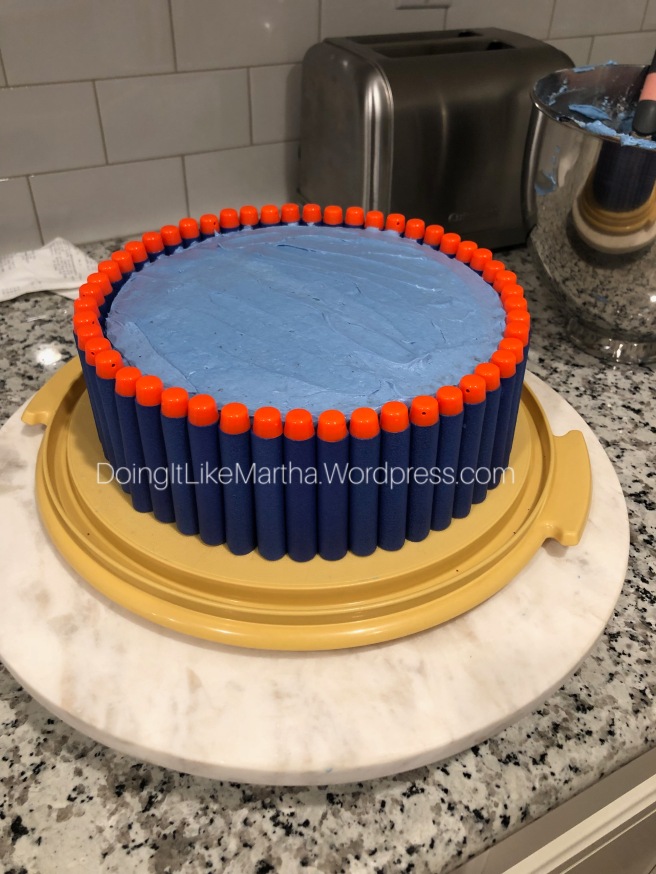
  • Set it in the fridge for about 30 minutes to become less tacky and then take it out again to frost it again.  ** For this nerf party, I did NOT do this, simply because I would be covering up the sides of the cake with her bullets. Im only explaining for those who will not be covering the sides of their cake. If you are mimicking this cake, then just do a messy coat on the sides, smooth the top (while trying to keep crumbs to a minimum on the top) and then stick on your nerf bullets. You do not need to put it in the fridge or do a second coat because the sides will be covered by nerf bullets. Add any decorations you want to the top, and voila! You’re done! IMG_9916Image-1-3.jpeg
  • Take your cake out, and if the frosting isn’t tacky then proceed with another layer of frosting, smooth the sides as you go, and there shouldn’t be crumbs in this coat, because they were sealed in when you did the initial crumb coat. This is what gives you a nice looking cake. Take your time, ideally use something that spins, like a lazy susan or a cake decorating pan that rotates. As I frost I spin it with my left hand and keep the spatula parallel to it and it REALLY smoothes it out nicely. Practice makes perfect, you just have to get in there and experiment. I like to start on the sides and finish the top last, smoothing the edges (while rotating the cake on my lazy susan) as I go and then you’re done!

Lastly- one tip I read that I do often is to DOCTOR up your cake mixes. This makes them moist and taste like it was made from scratch.. when it wasn’t! Here is what you do with any boxed cake mix.

Doctored Cake Mix...Make Them Think It's From Scratch!

Ingredients:

  • 1 Box of cake mix (Duncan Hines, Pillsbury, Betty Crocker)
  • 3 eggs
  • 1/2 cup butter (use butter NOT margarine)
  • 1 cup water

Directions:

  1. Preheat oven to 350
  2. Melt the butter in the microwave
  3. Combine butter with the remaining ingredients in a medium bowl.
  4. Mix on low for 1 minute. Then mix on HIGH for 1 minute.

This will give your cake a nice creamy and thick texture- not thin and runny. You will taste the difference.

Bake time:

2-6″ cake pans 35-40 minutes

2-8″ cake pans 35-38 minutes

9×13″ cake pan 35-38 minutes

cupcakes 20 minutes

*cake is done with a toothpick or my favorite tool is inserted and comes out clean. My mom always said, when you smell it, its done. So humor her, and check on the cake if you really smell it and the timer is still going. It could be done!

I hope this gives you an idea how to assemble your own cakes, and help you with your baking! Thanks for reading!

XoXo

-Hannah

Image-1

Protein Packed Slow Cooker Turkey Chili

Happy New Year!!

I still can’t believe its 2015!

I have been cooking up some great (and healthy) recipes and doing some projects that have been easy that I cannot wait to share with you!!

First, I think I will start with this chili recipe I tried last night. It was DELICIOUS! Literally the whole meal, my husband and I kept saying “wow, this is so good!” “this is delicious” “we have to make this all the time”.

My favorite part is, IT’S COOKED IN THE CROCK POT!!

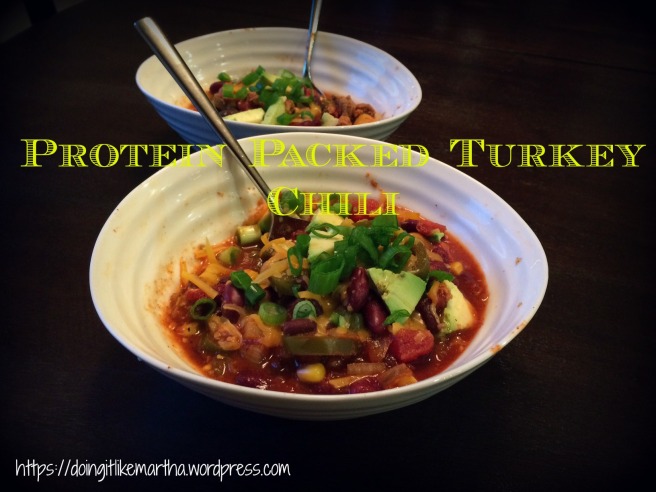
turkey chili

So- give it a whirl, it was quick and nutritious, and easy! Im learning to take better pictures of food (which is an art in itself, that I haven’t mastered) so if my picture is off-putting, I promise it will taste great!

I found this recipe on Pinterest, click to see original recipe 

Ingredients:

  • 1 Tb olive oil
  • 1 lb lean ground turkey
  • 1 medium onion, diced (i used white)
  • 2 (15oz) cans of tomato sauce
  • 2 (15 oz) cans of petite diced tomatoes
  • 1 (16oz) jar of deli sliced tamed jalapeños, drained
  • 1 C frozen corn
  • 1 red bell pepper, chopped
  • 1 yellow bell pepper, chopped
  • 2 (15 oz) cans of black beans, rinsed and drained
  • 2 (15 oz) cans of red kidney beans, rinsed and drained
  • 2T chili powder
  • 1 T cumin
  • salt and pepper to taste

Directions:

1. Heat olive oil in a skillet over medium heat, place turkey in the skillet, season with salt and pepper and cook until brown. Put that in the crock pot.

2. Add all of the ingredients: diced onion, chopped bell peppers, tomato sauce and diced tomato, rinsed and drained beans, drained jalapeños, corn, chili powder and cumin. Season with a little more salt and pepper, give it a stir and turn the crock pot on!

3. Cover and cook on HIGH for 4 hours, or LOW for 6.

Serve with (optional toppings): chopped green onions, shredded low fat cheese, avocado (my favorite), reduced fat sour cream/ greek yogurt, cilantro, the possibilities are endless- but its AMAZING!

Hope you all try it and enjoy it!! I love dinners that are healthy, easy, and cooked in the crock pot!